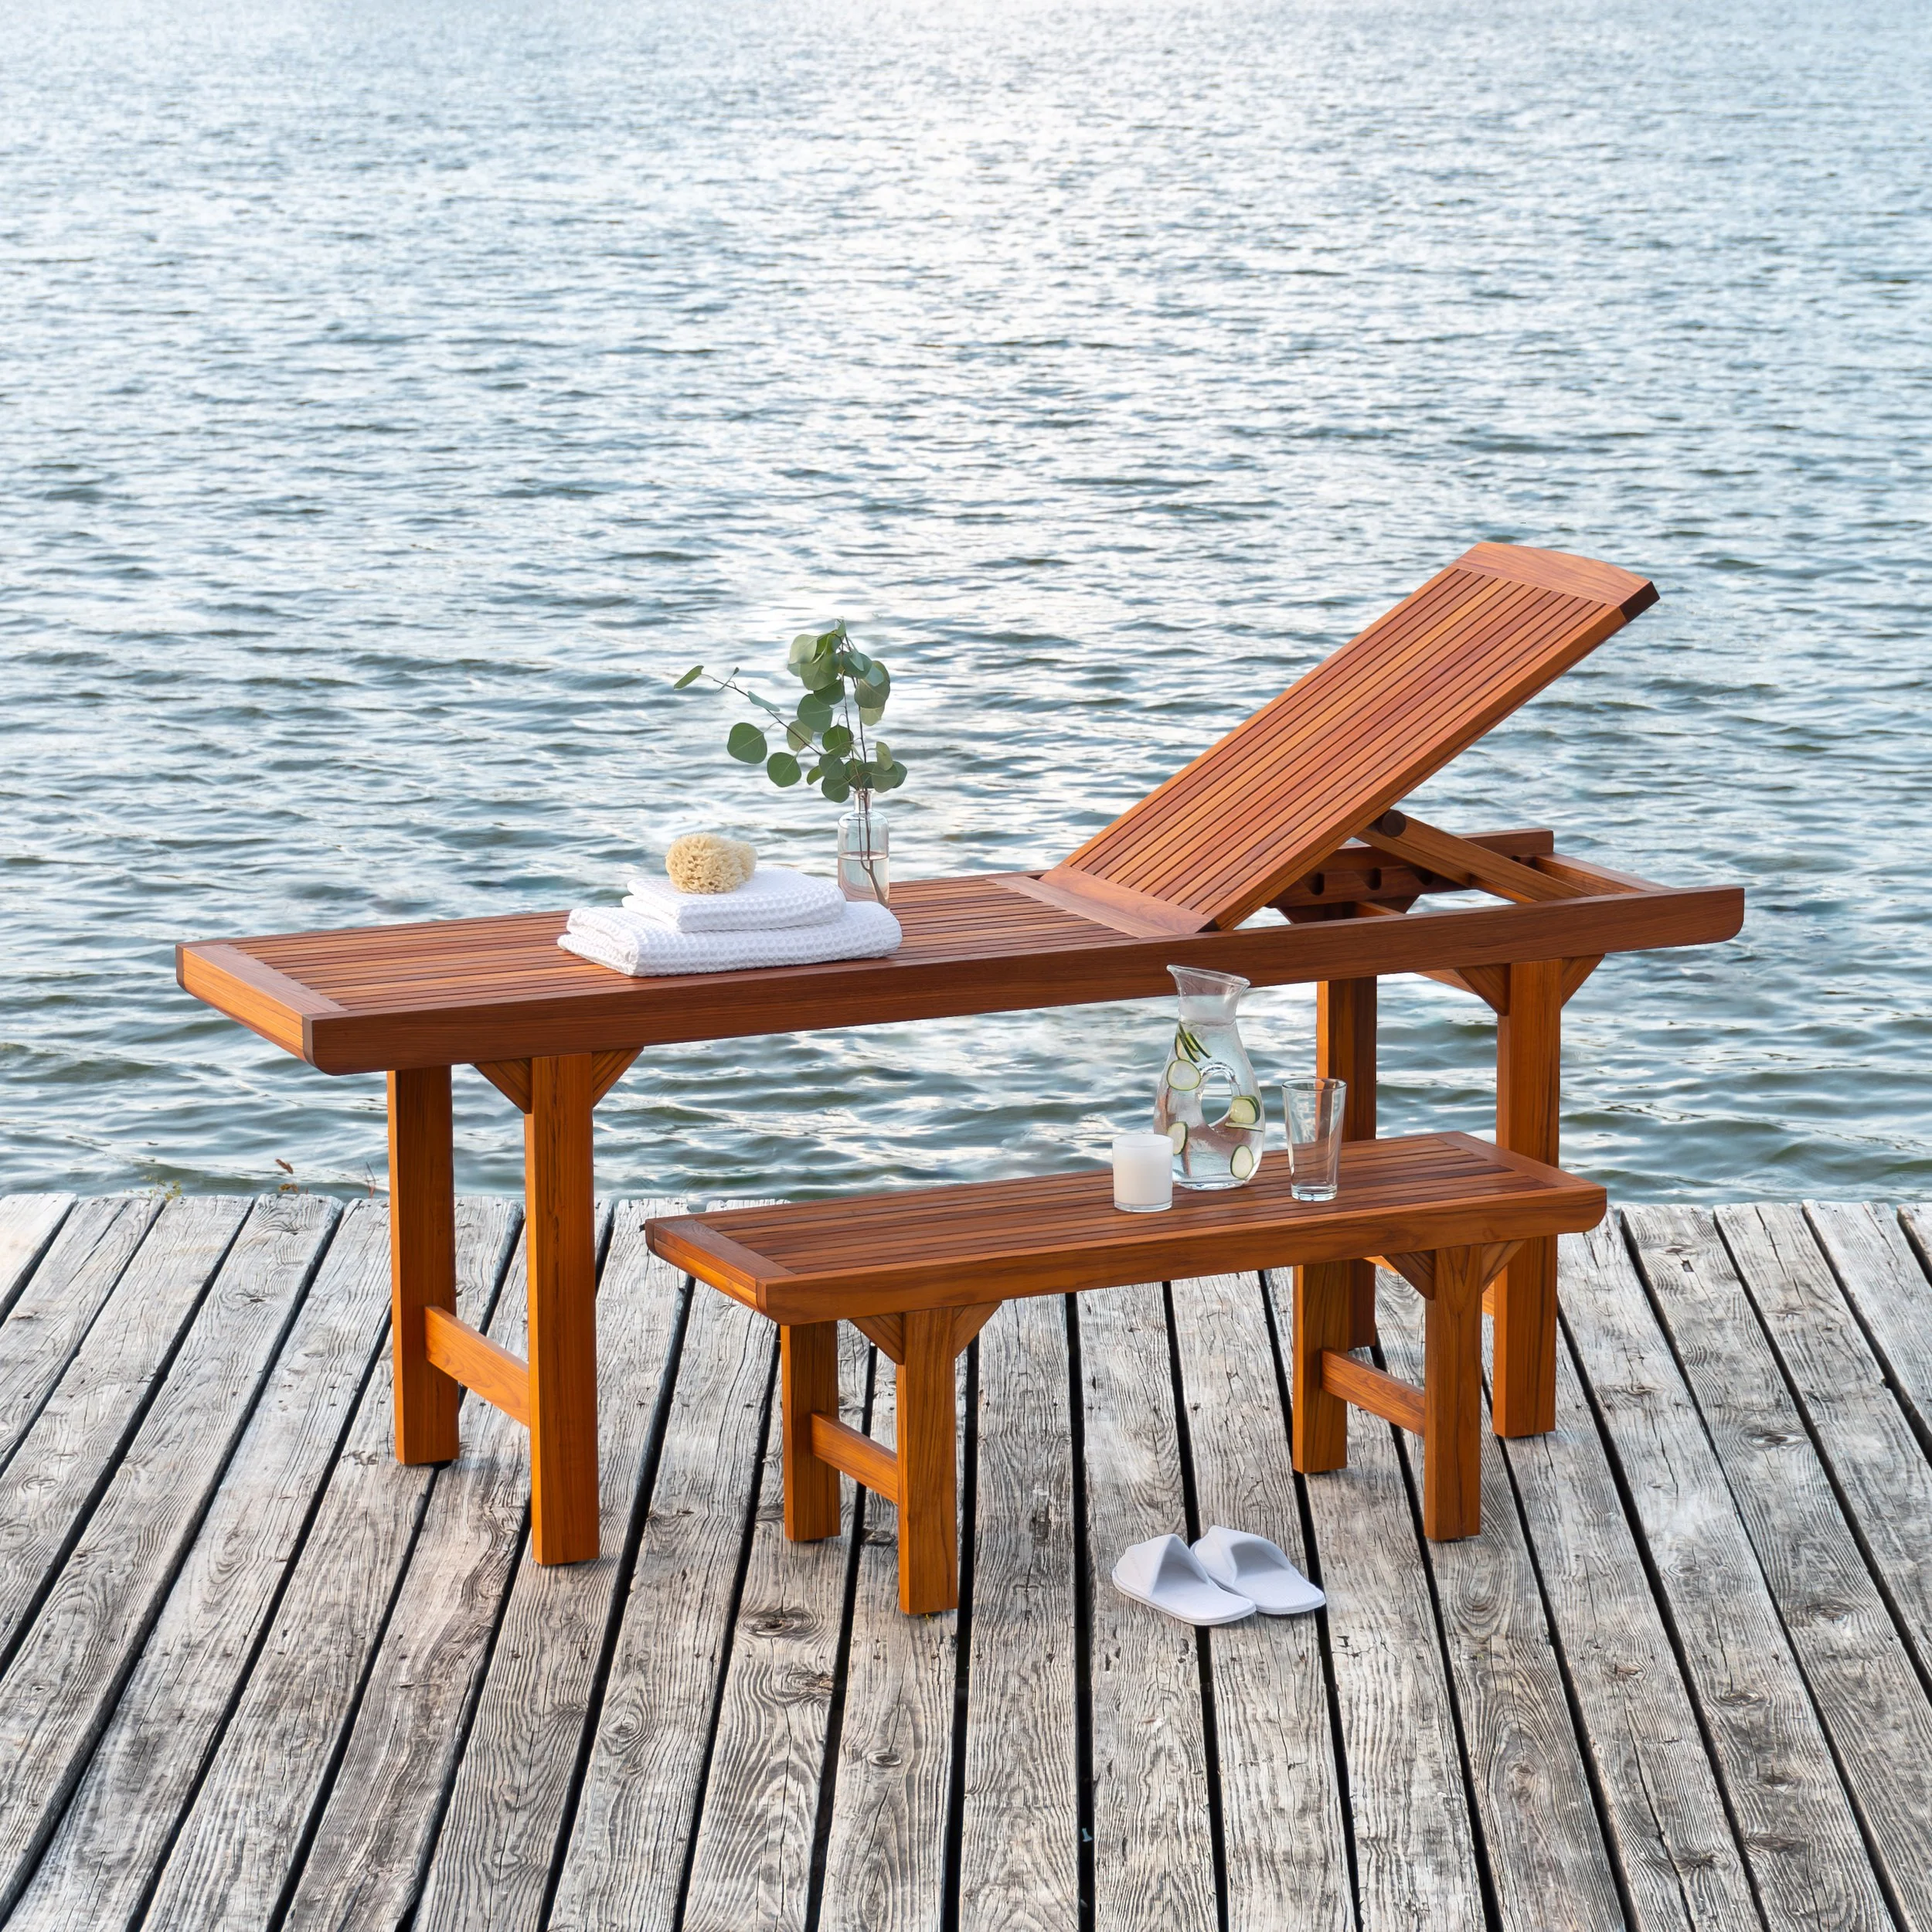
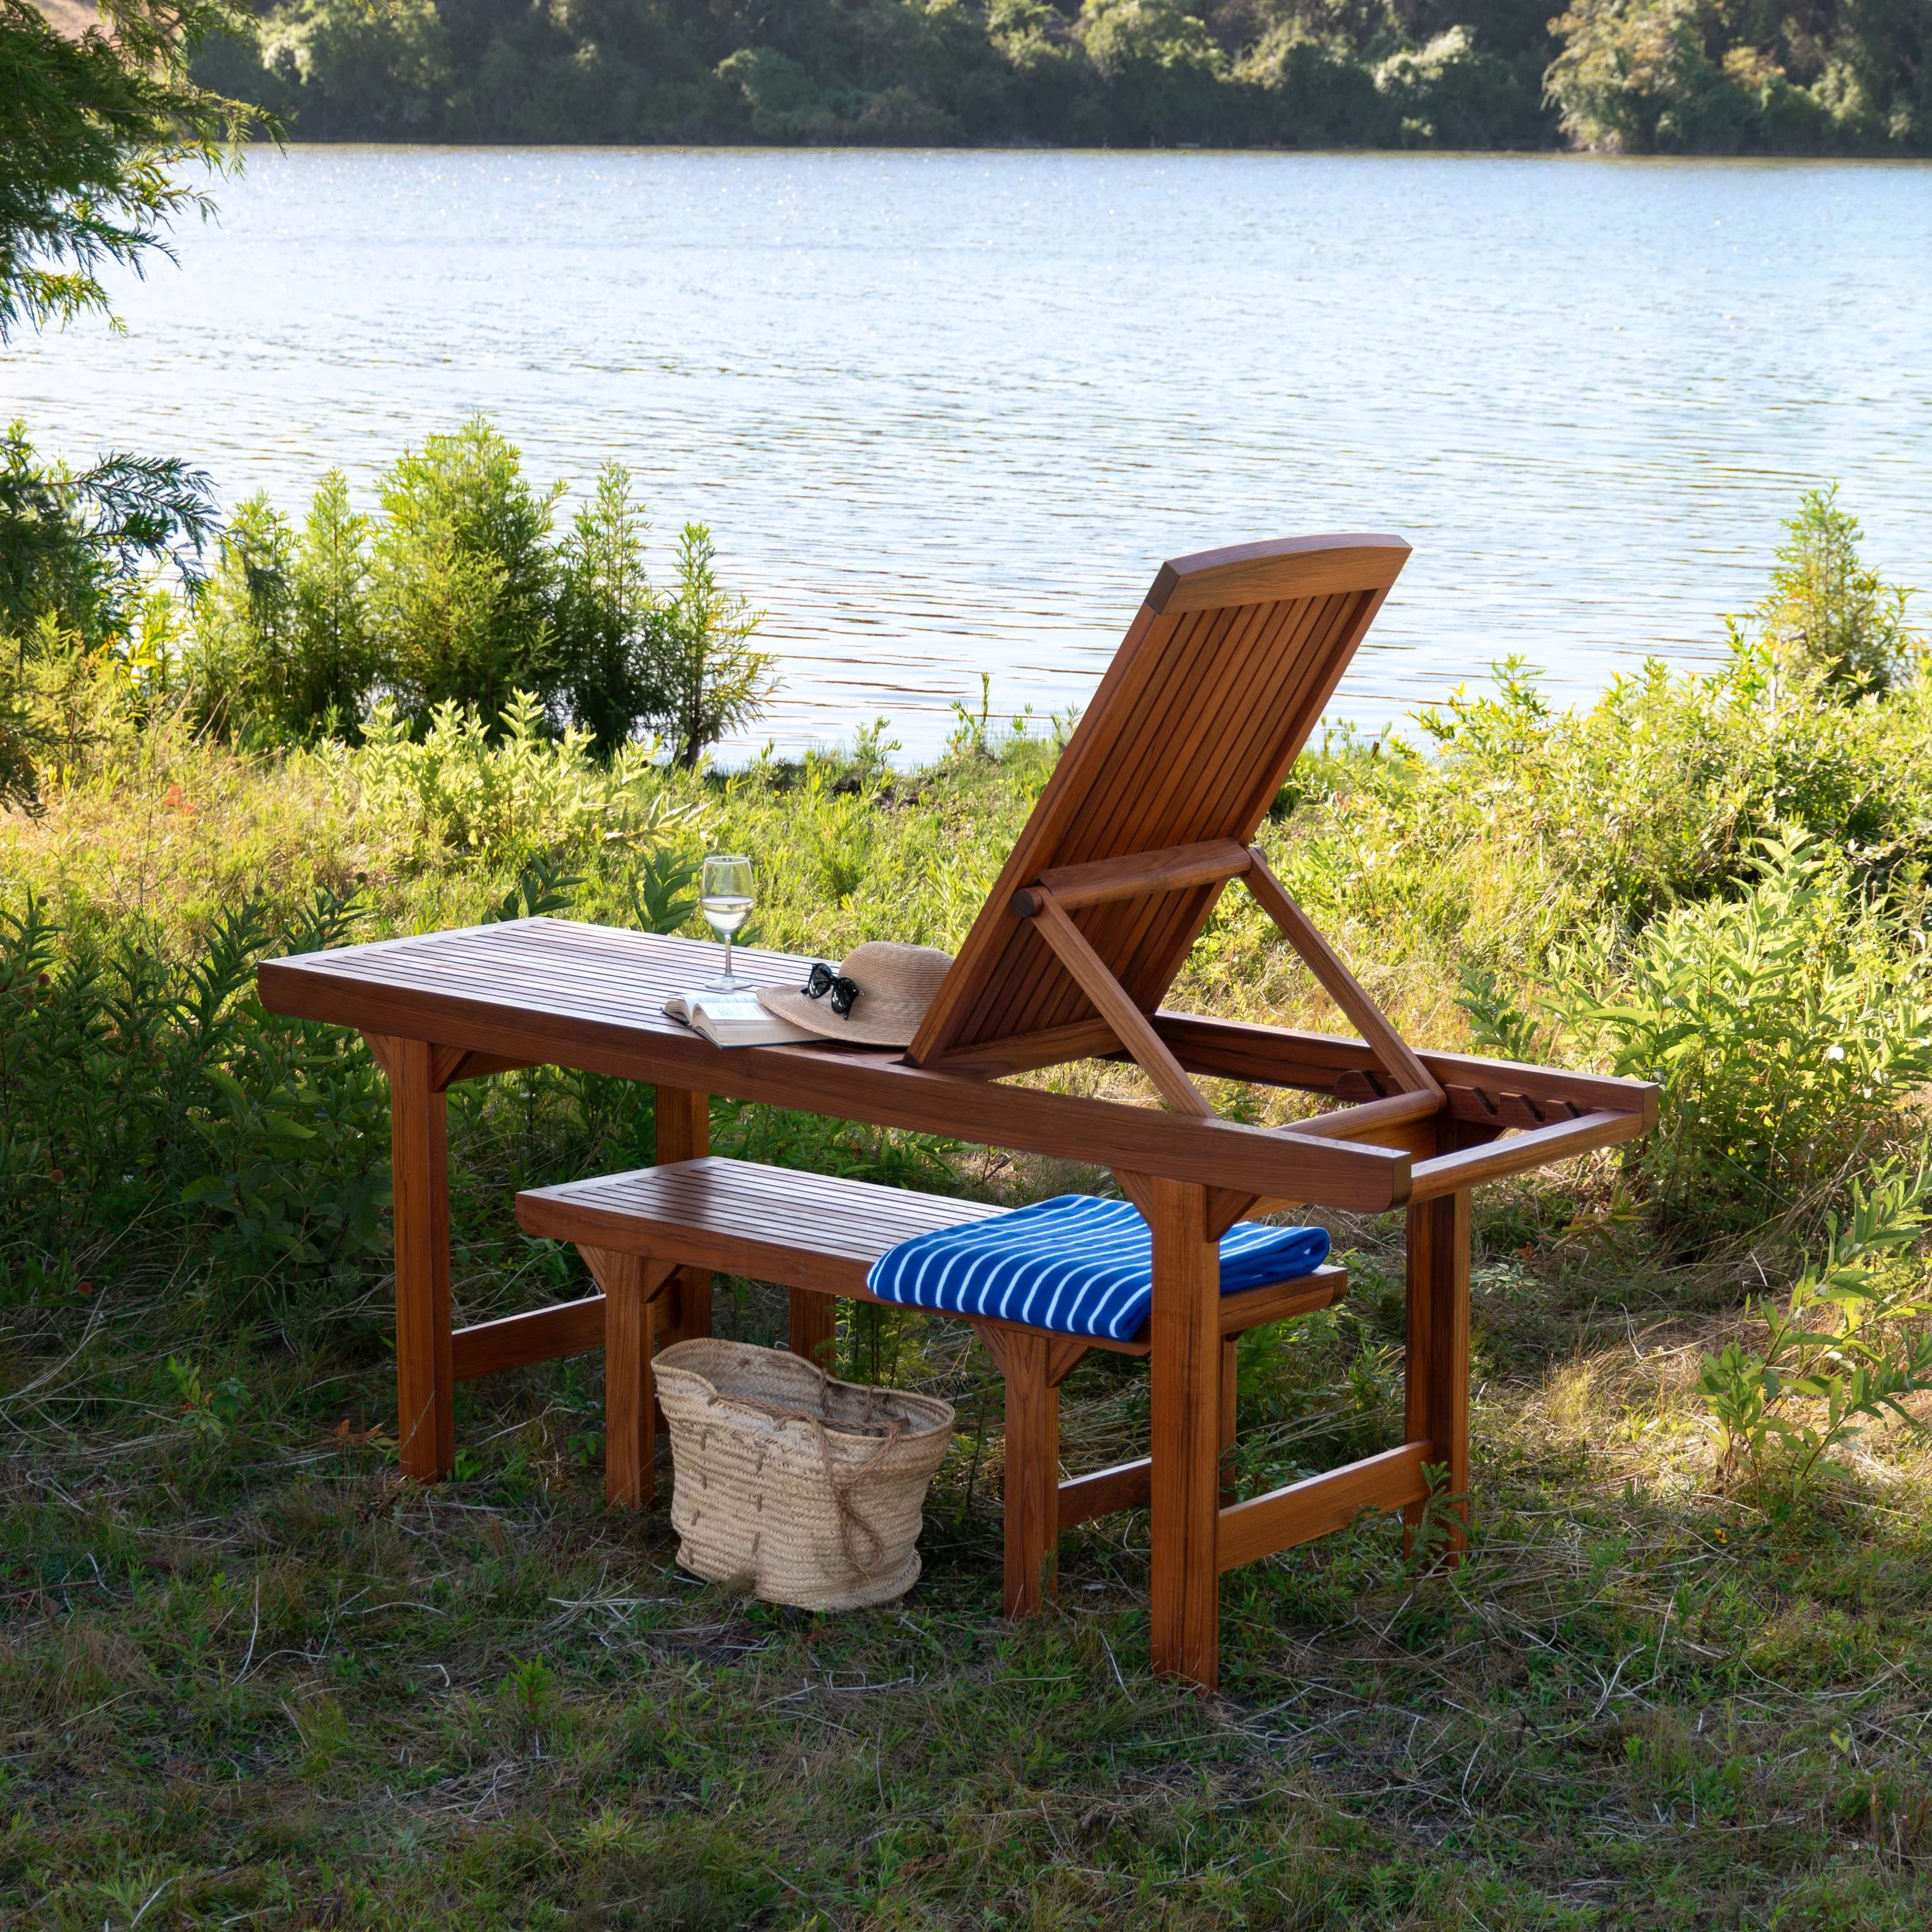
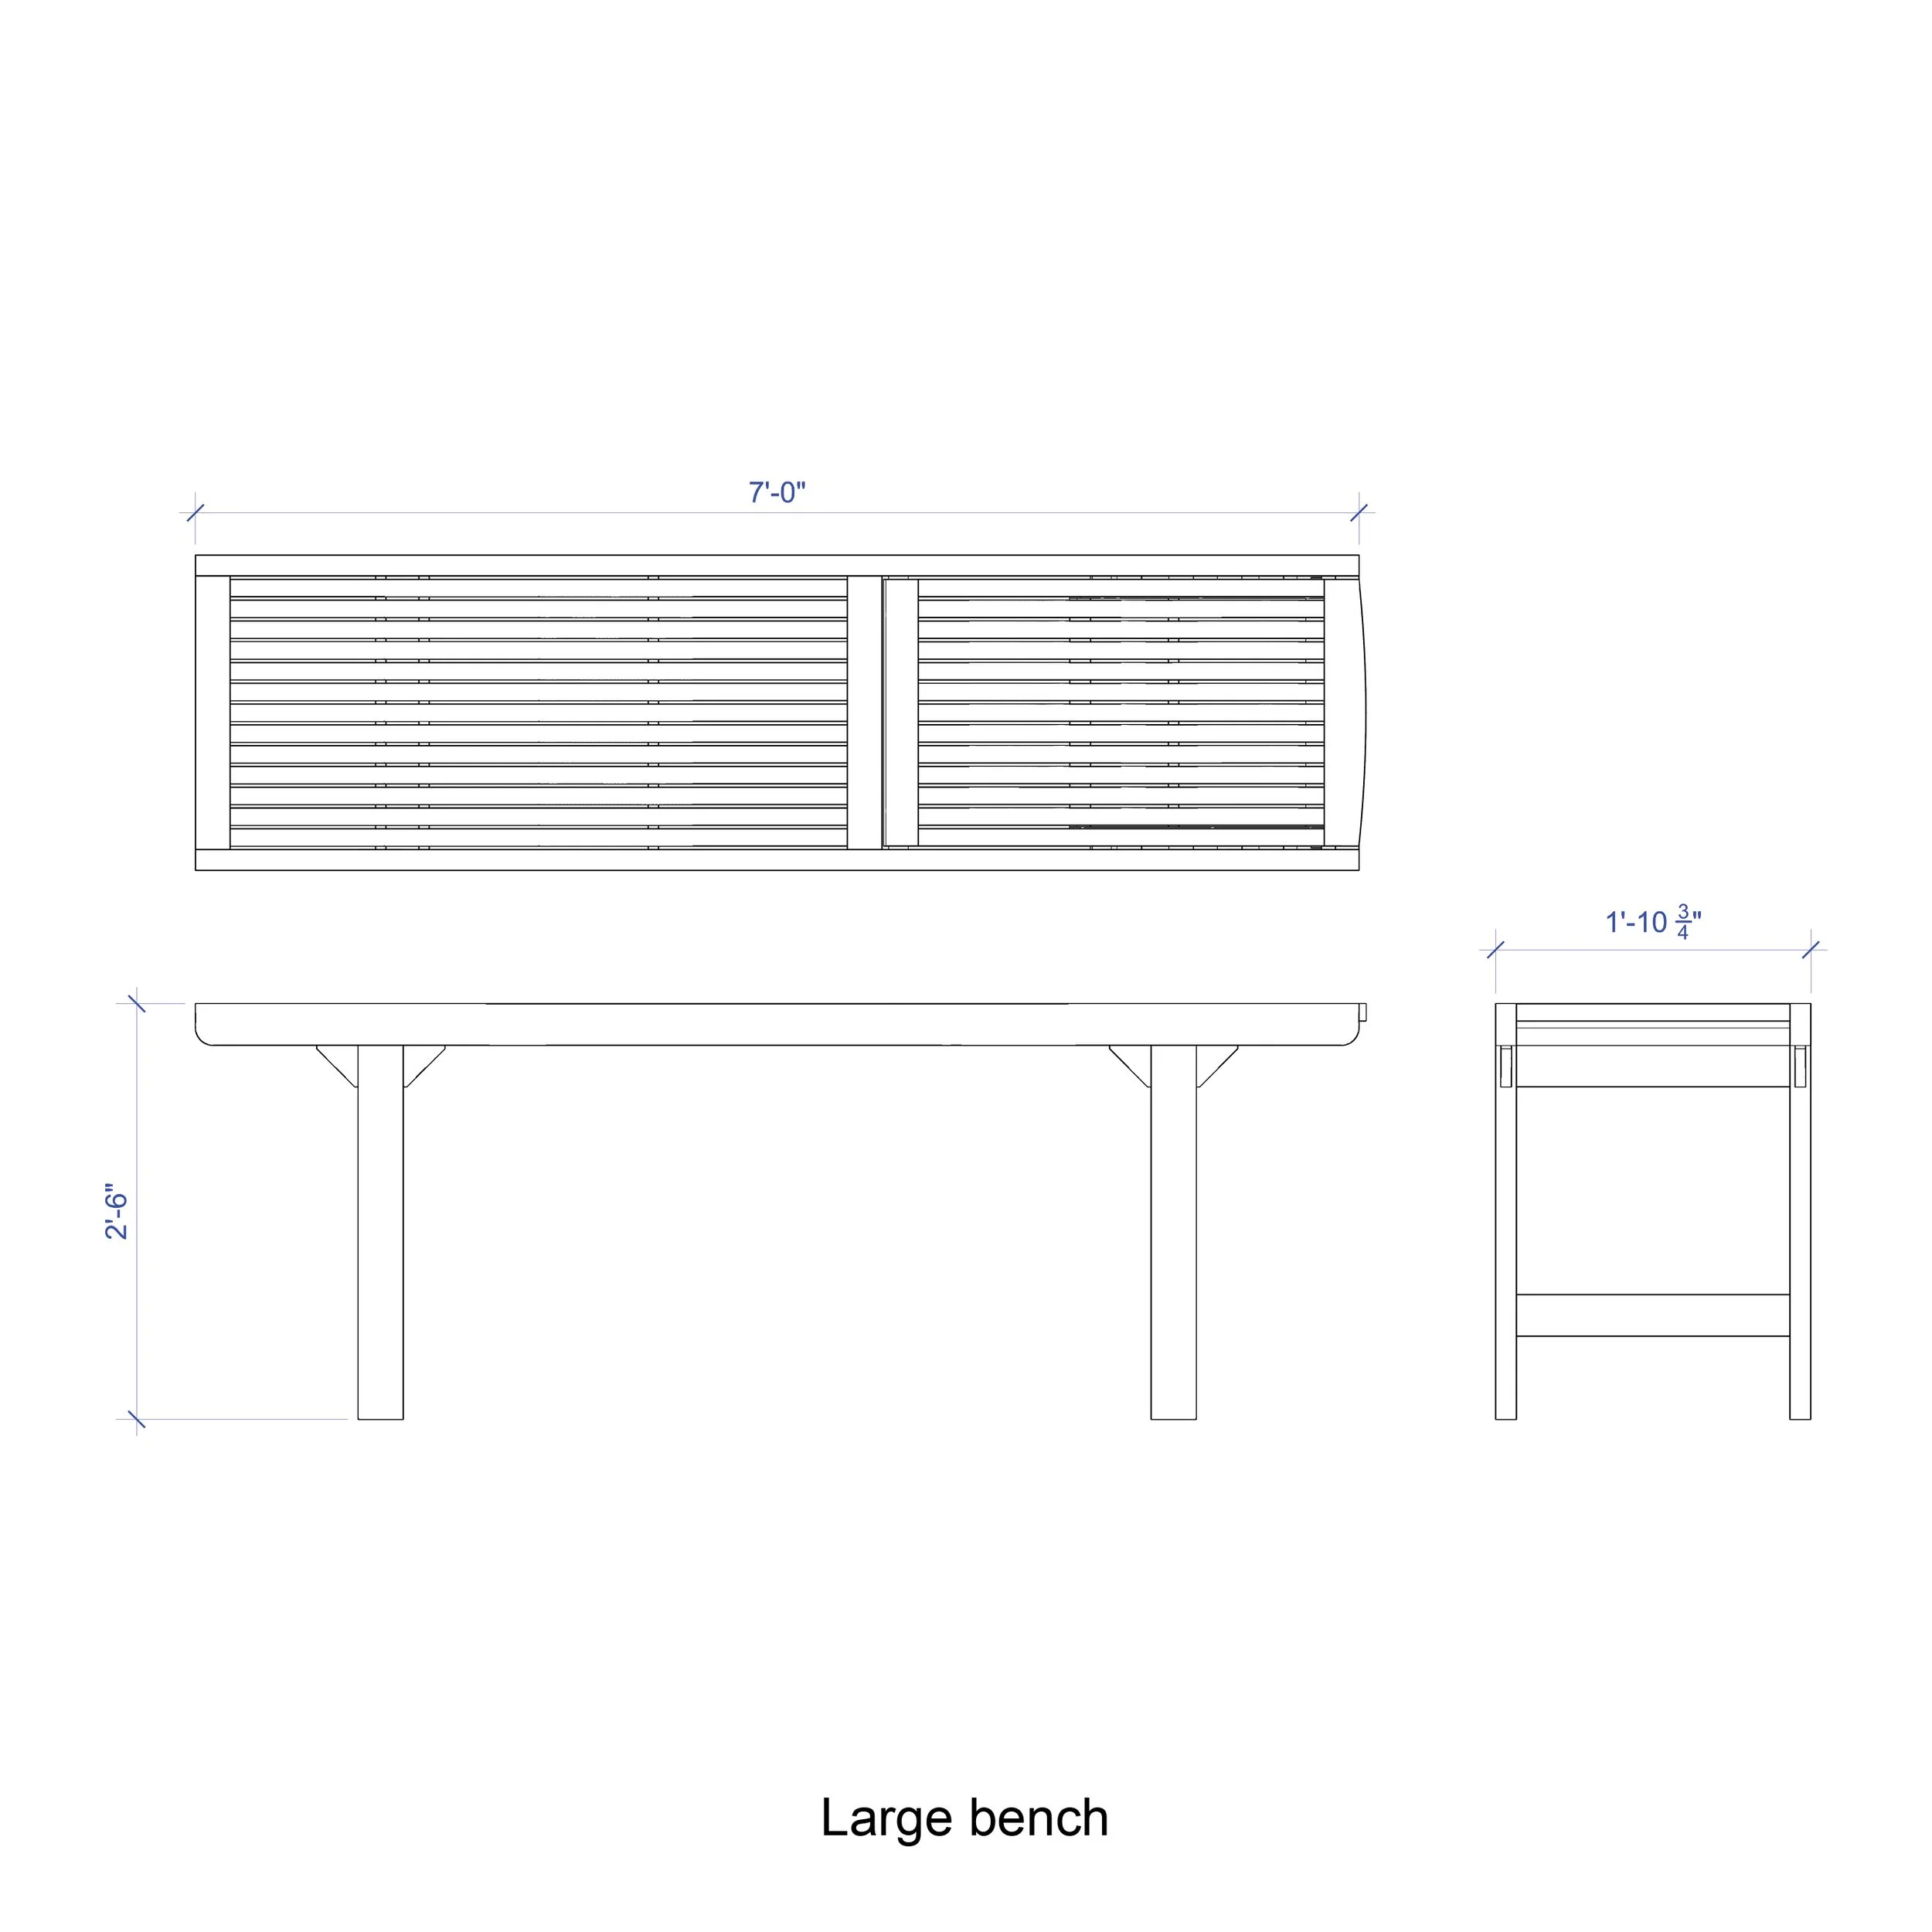
![903 spa up 34 square.jpg](https://images.squarespace-cdn.com/content/v1/5c89d4d14d8711f0c89e0e2c/1693769637582-VSDECUNNWK7NAVHATBKZ/903+spa+up+34+square.jpg)
![831 spa up square.jpg](https://images.squarespace-cdn.com/content/v1/5c89d4d14d8711f0c89e0e2c/1693522902417-0CK9LOEDH5HH19ZEF6RH/831+spa+up+square.jpg)
![831 spa down square.jpg](https://images.squarespace-cdn.com/content/v1/5c89d4d14d8711f0c89e0e2c/1693522896468-66FQ655MBQ4FHER6I439/831+spa+down+square.jpg)
![831 beach set square.jpg](https://images.squarespace-cdn.com/content/v1/5c89d4d14d8711f0c89e0e2c/1693522147387-6Y48OFCP9X380U3I41W9/831+beach+set+square.jpg)
![Teak Shower Bench Shower.jpg](https://images.squarespace-cdn.com/content/v1/5c89d4d14d8711f0c89e0e2c/1701726874226-3PCDK74FHEZU6885N6XE/Teak+Shower+Bench+Shower.jpg)
DESIGN
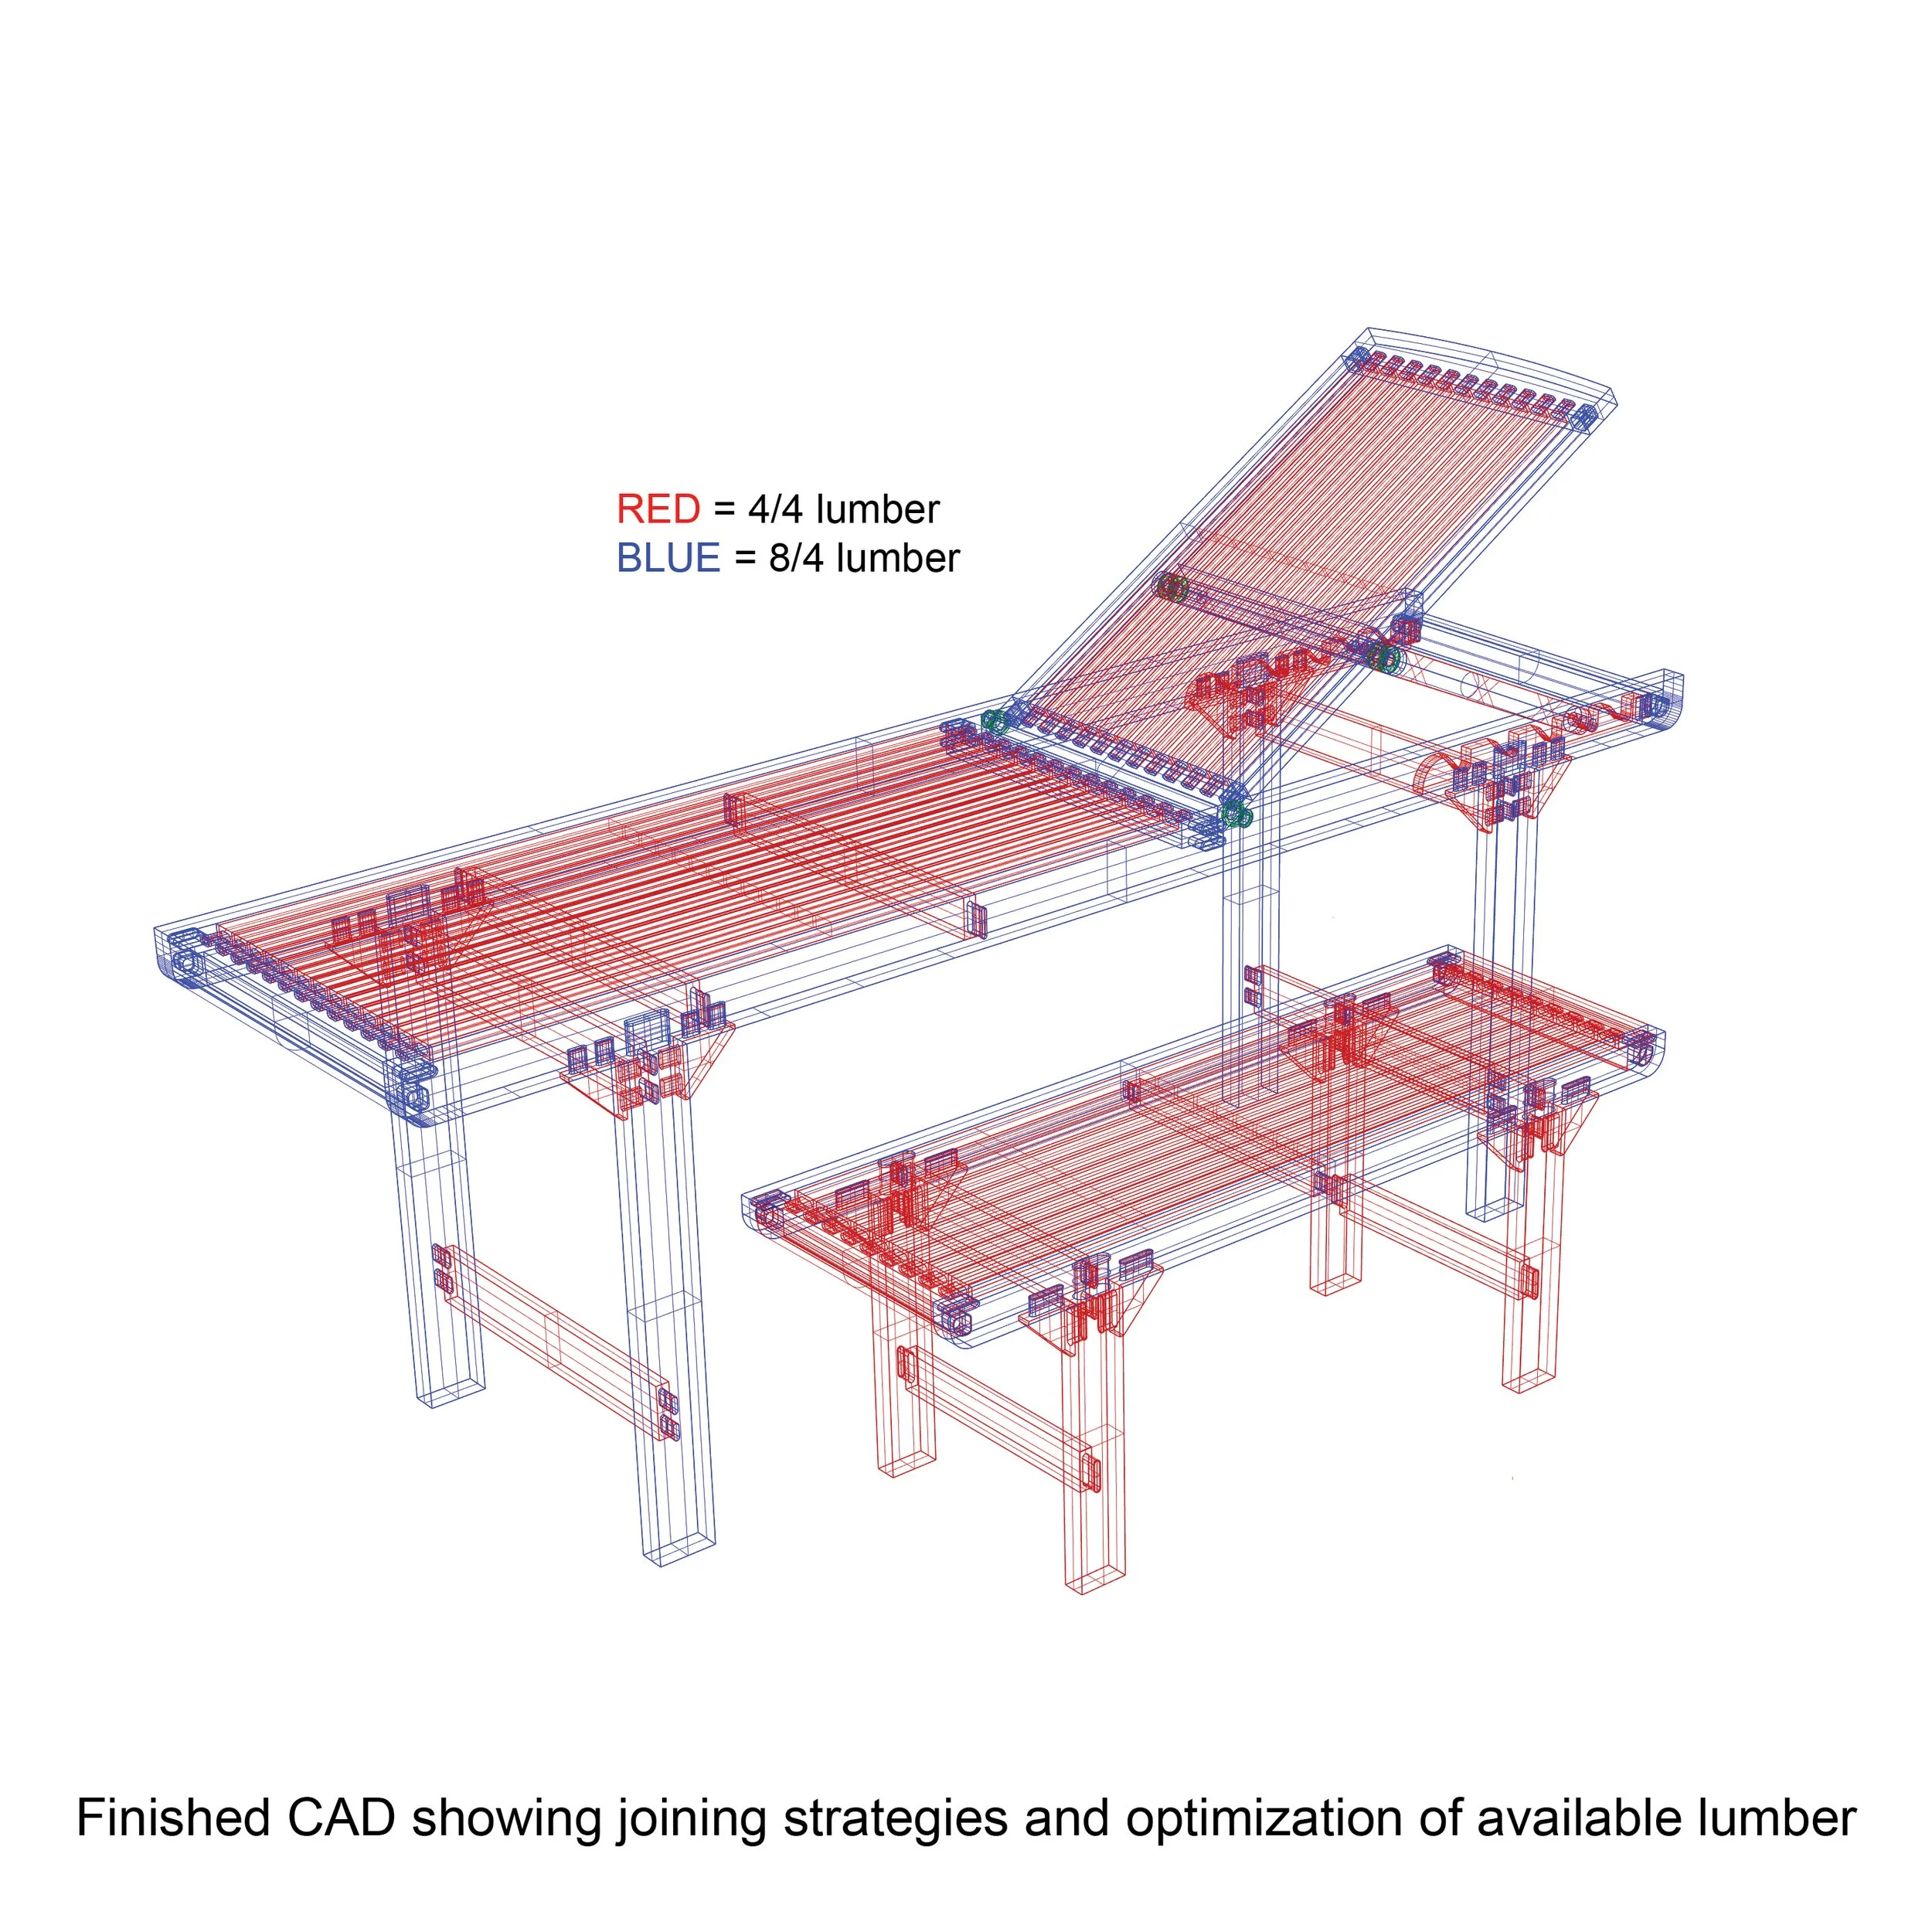
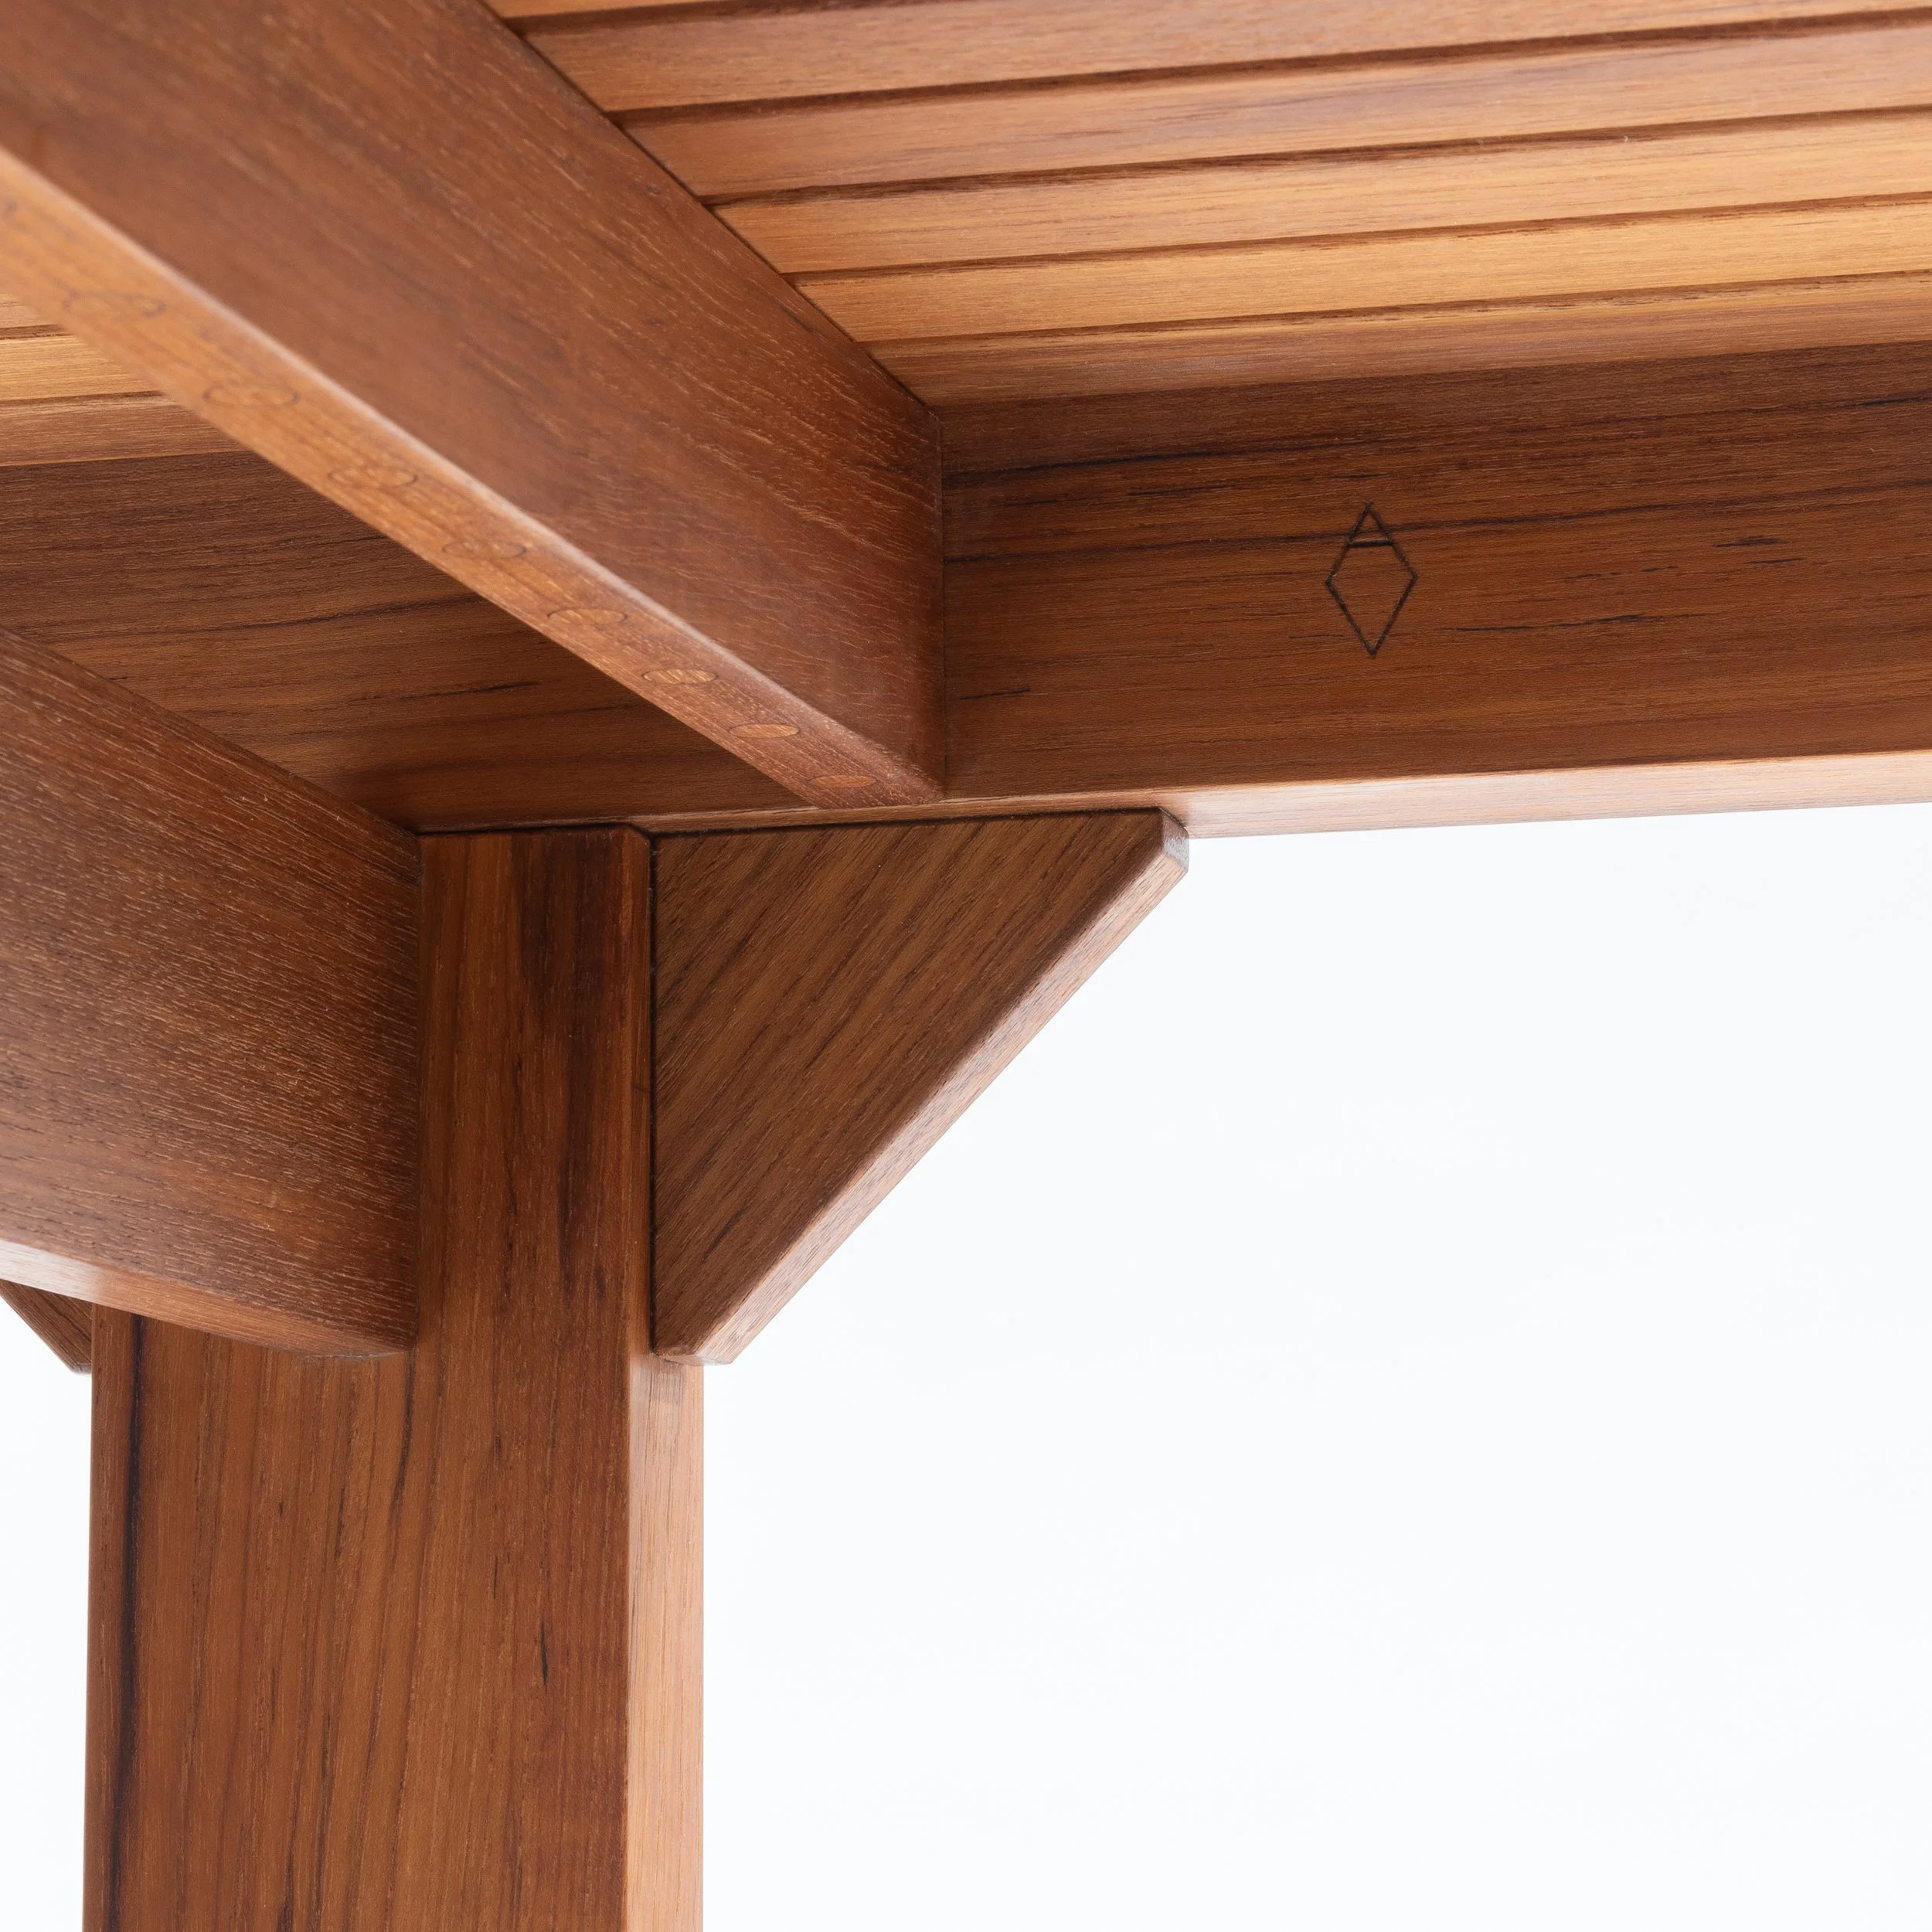
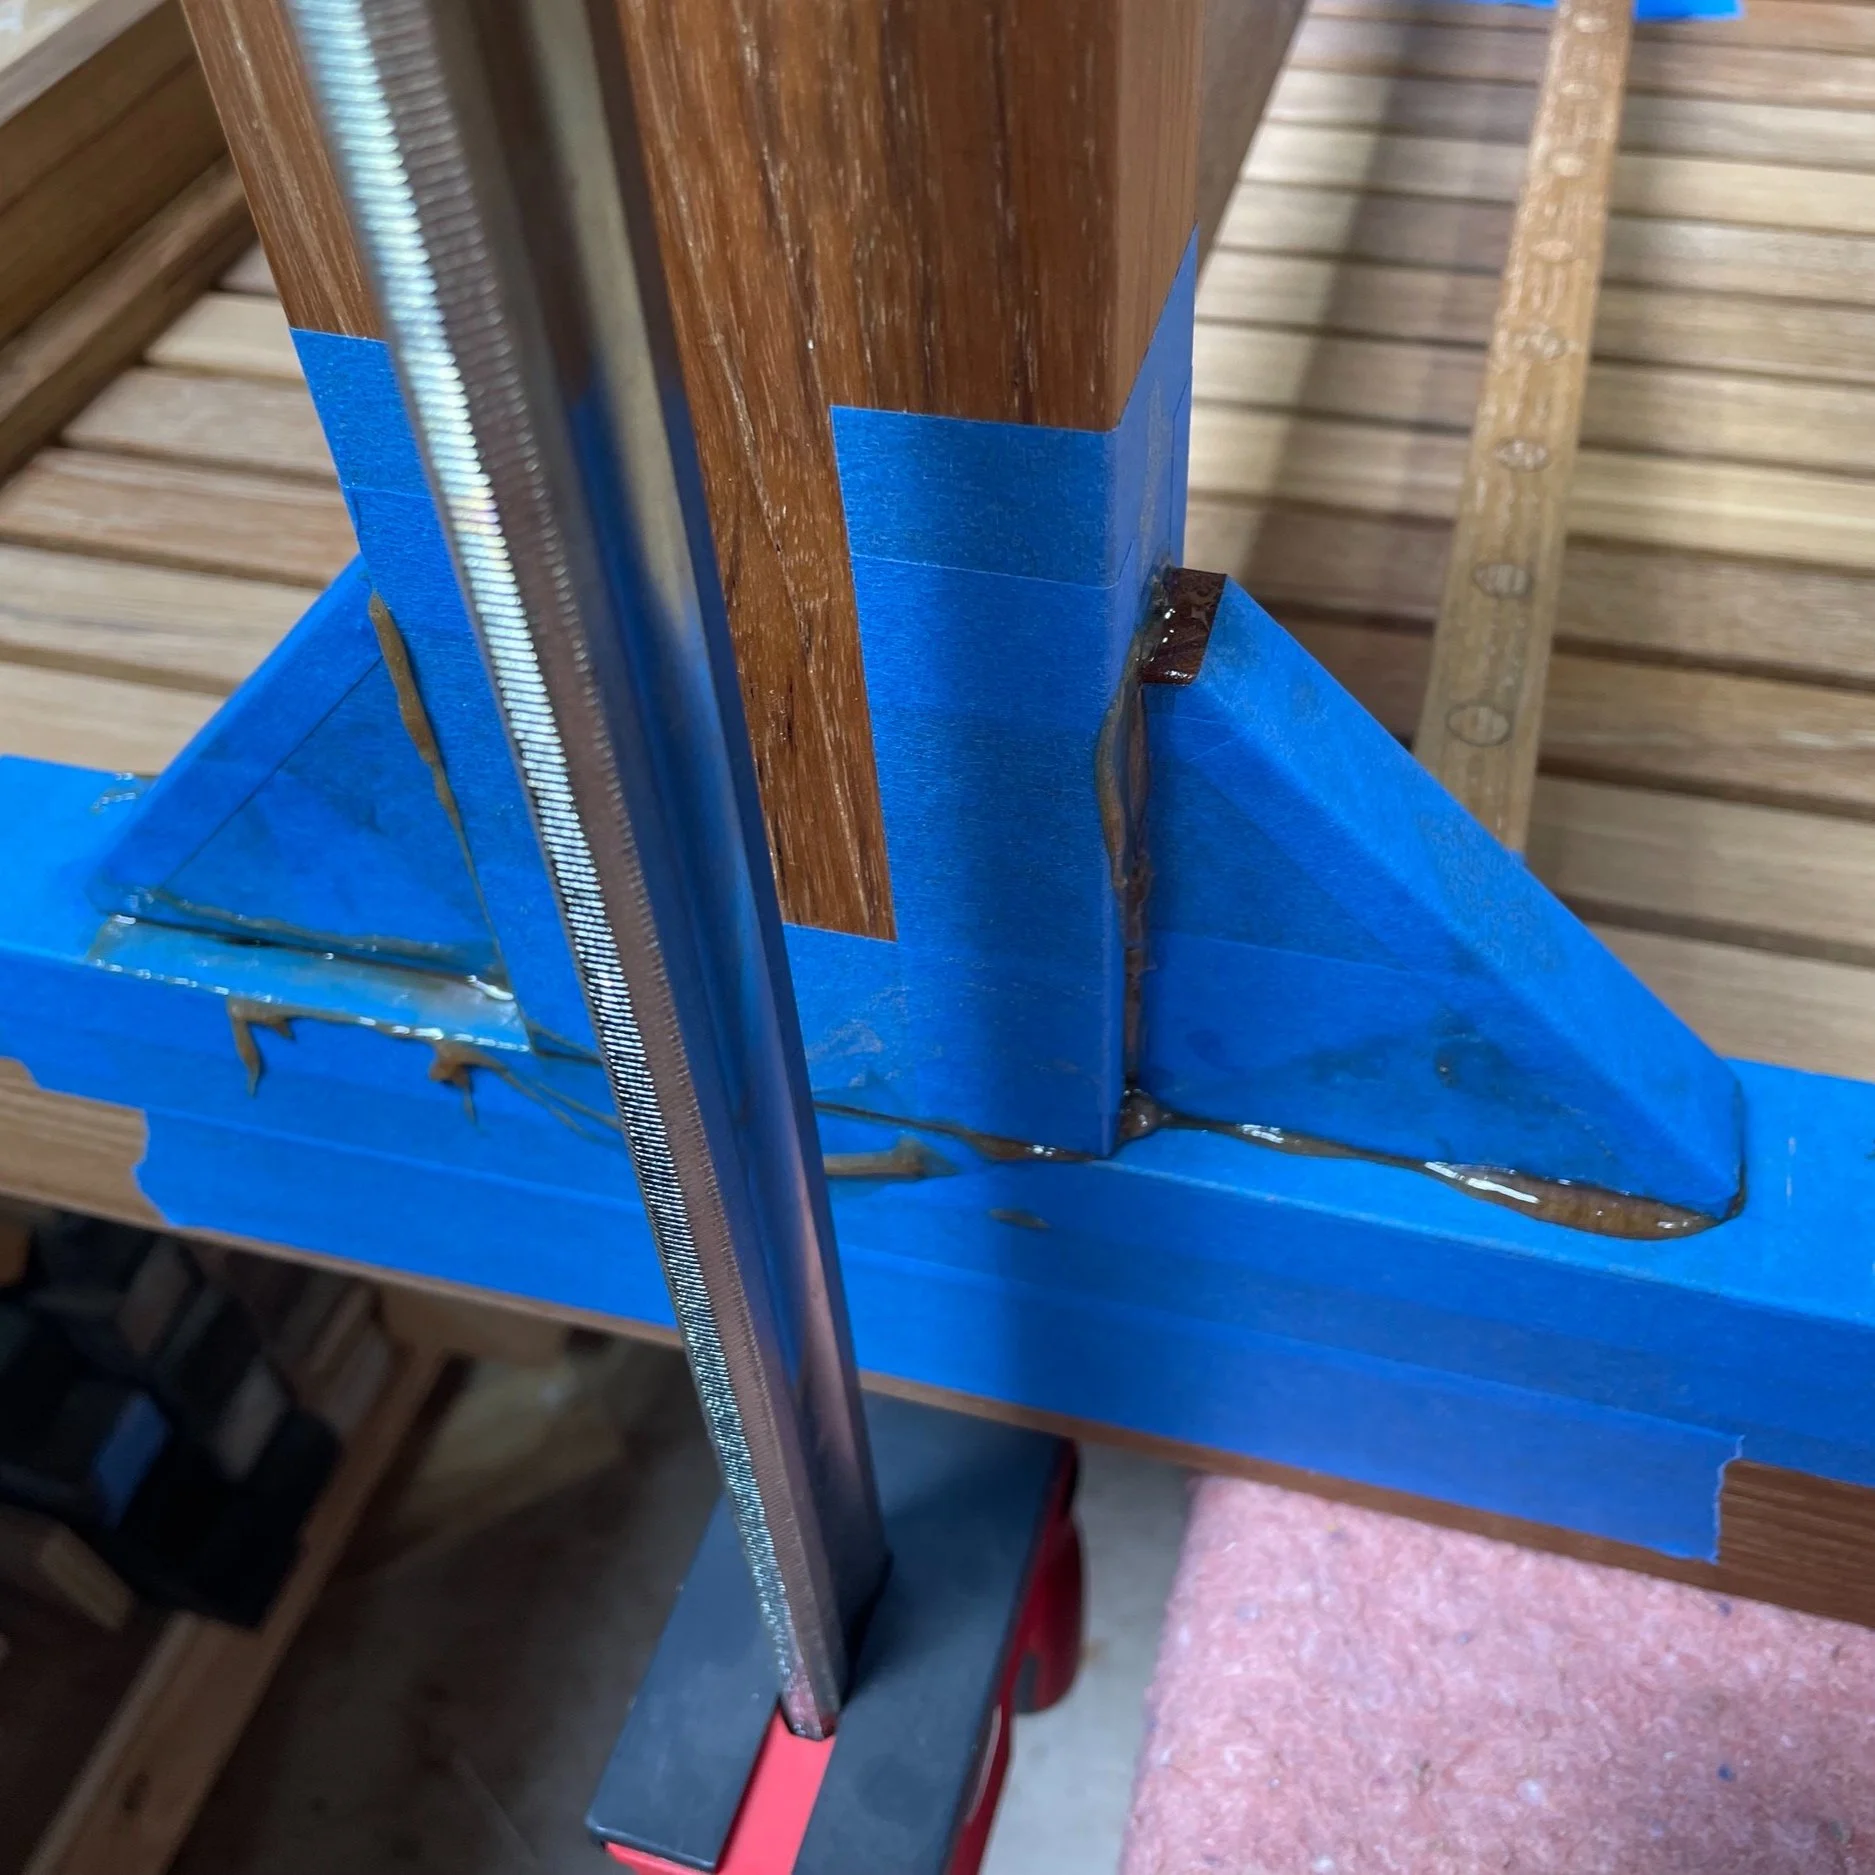
I was drawn to this project for the complexities it posed. The client wanted a set of nesting benches for a steam shower, the larger being adjustable for a range of reclining positions. Steam is among the harshest environmental conditions for wood furniture, so every detail needed to be carefully considered. Teak was the only suitable choice of wood due to its exceptional stability in wet and humid environments, and I cut no corners in the benches’ construction, using nearly 200 mortise and tenons secured with structurally reinforced marine grade epoxy.
![wireframe2.jpg](https://images.squarespace-cdn.com/content/v1/5c89d4d14d8711f0c89e0e2c/1691166461623-NYNMIP95891RFCXL4910/wireframe2.jpg)
![mechanism development final.jpg](https://images.squarespace-cdn.com/content/v1/5c89d4d14d8711f0c89e0e2c/1691419220336-J2CI9ZL39N1MMRH5CBO1/mechanism+development+final.jpg)
![large bench drawing.jpg](https://images.squarespace-cdn.com/content/v1/5c89d4d14d8711f0c89e0e2c/1690852984977-PGMQFDL6YRTE4V135K6U/large+bench+drawing.jpg)
![small bench drawing.jpg](https://images.squarespace-cdn.com/content/v1/5c89d4d14d8711f0c89e0e2c/1690852979319-D6PT7W89NM93USYKWY6Q/small+bench+drawing.jpg)
DETAILS
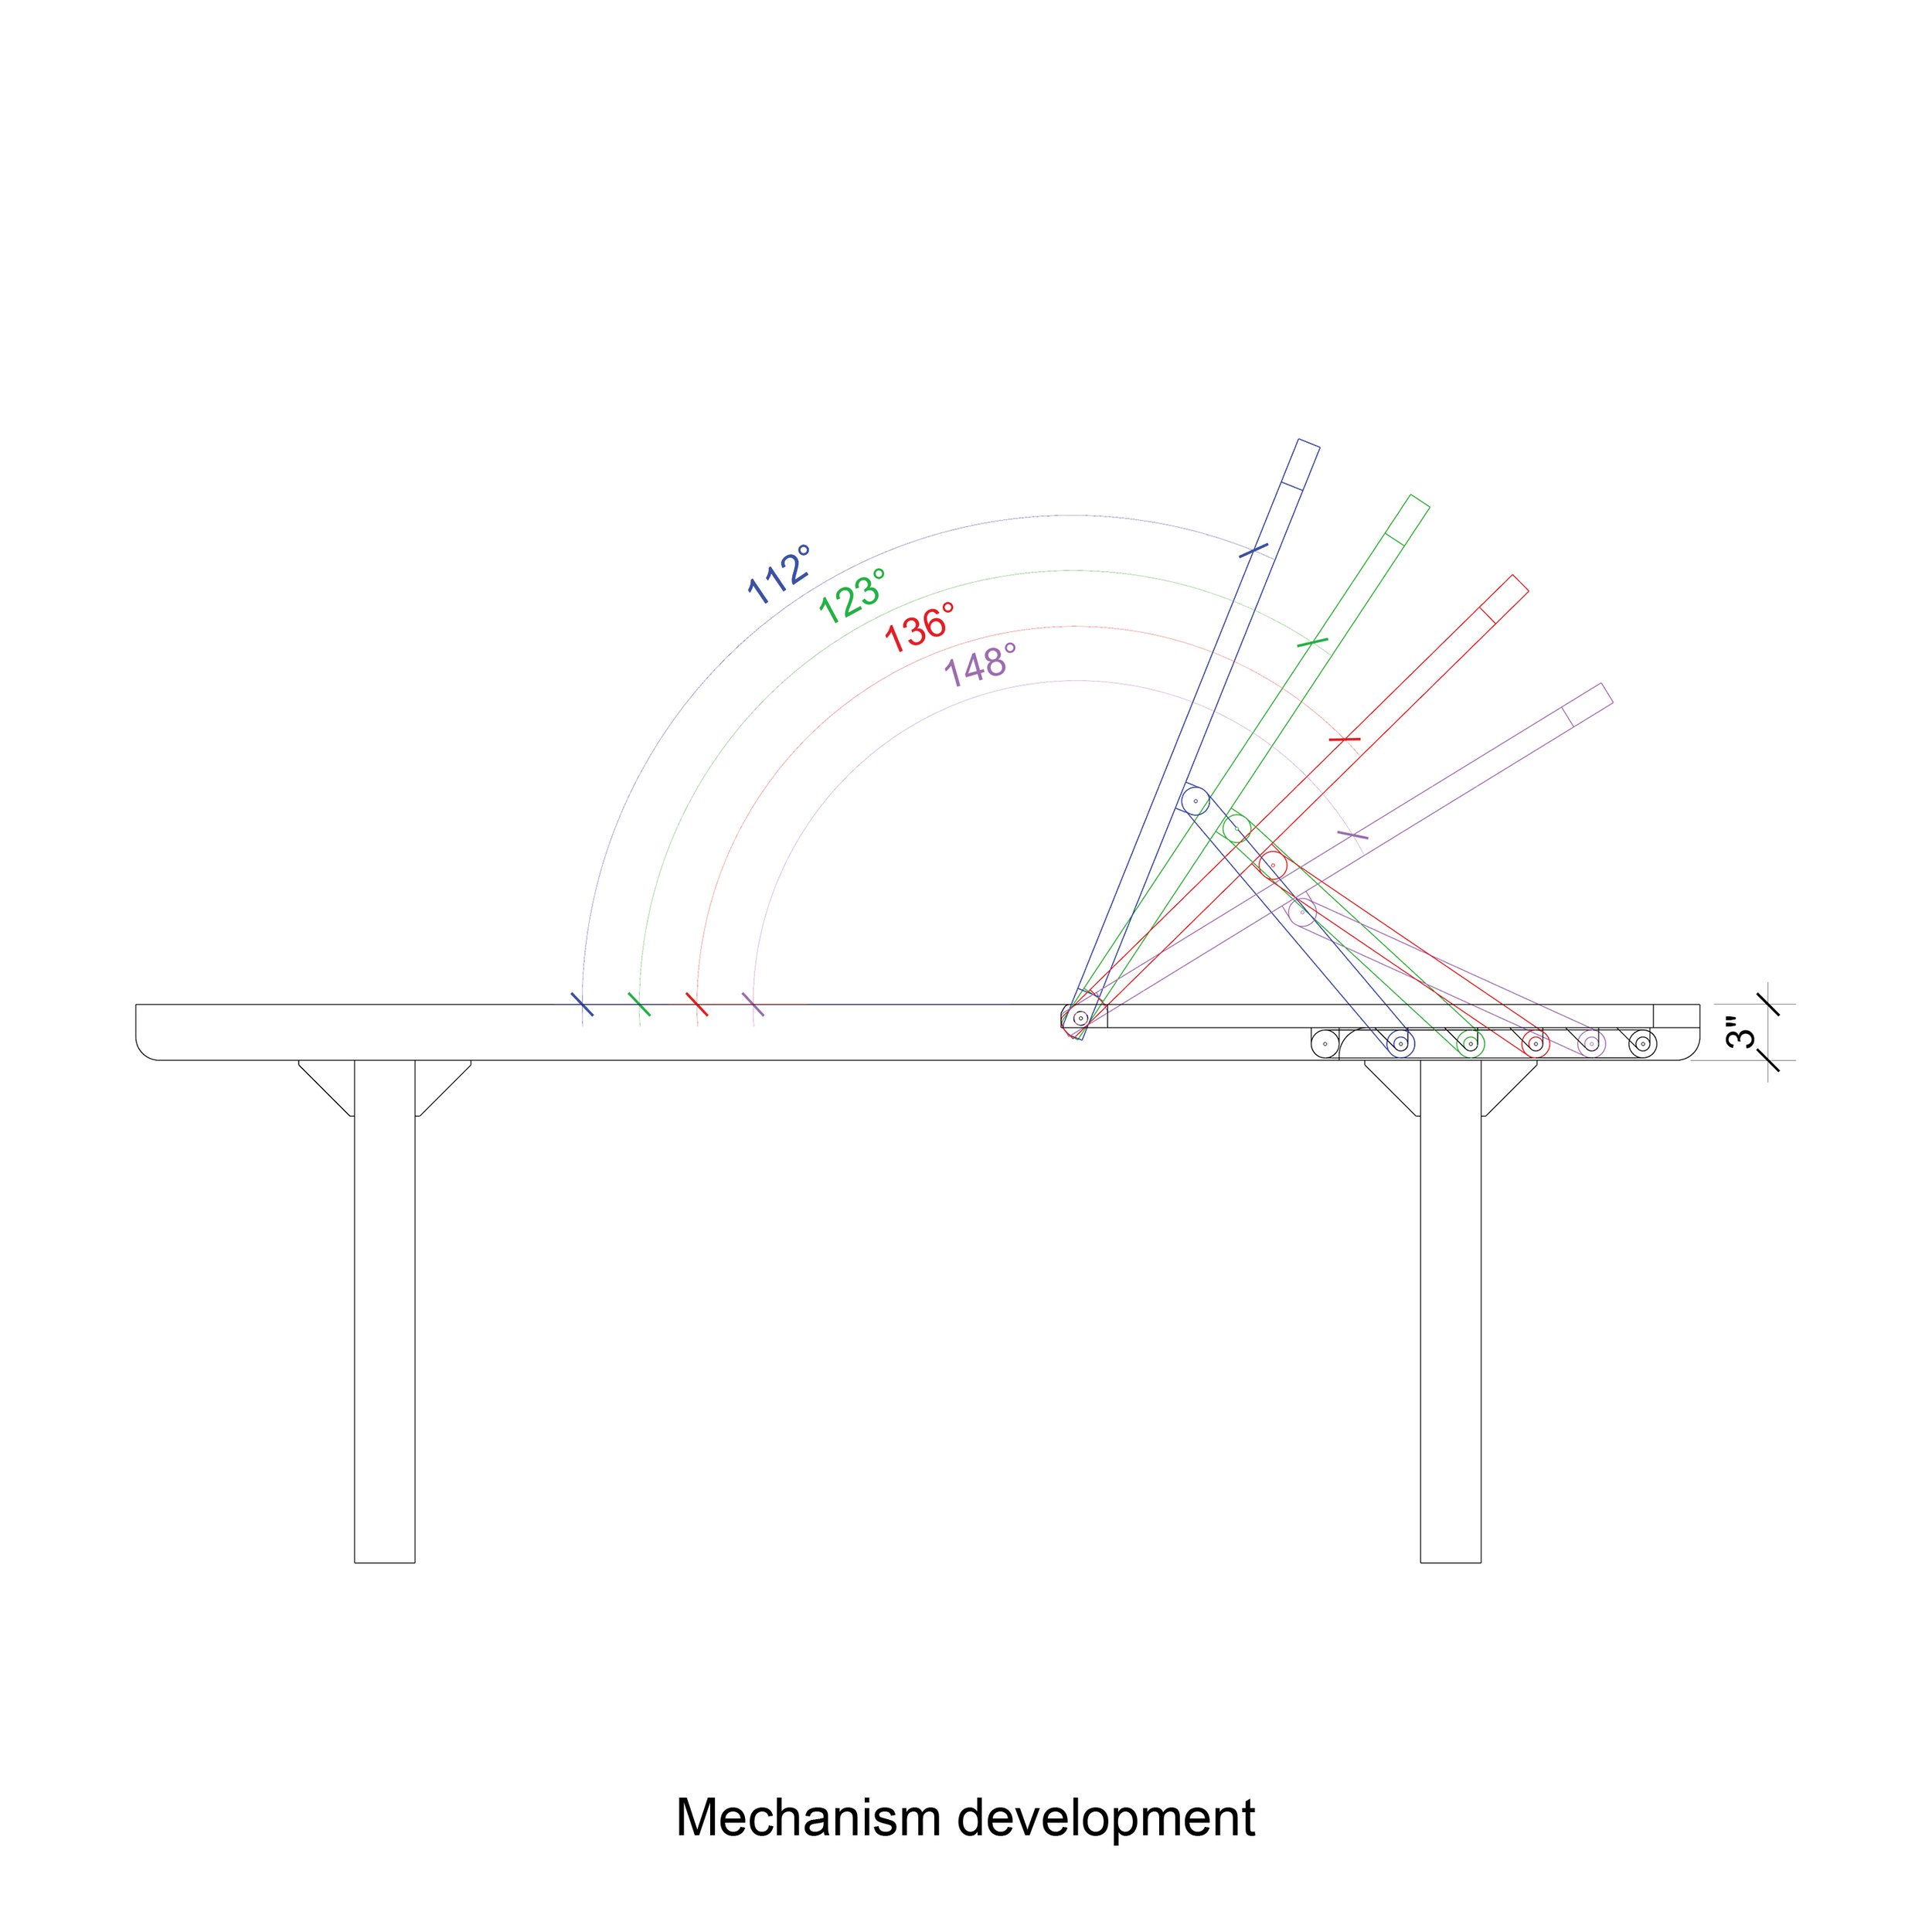
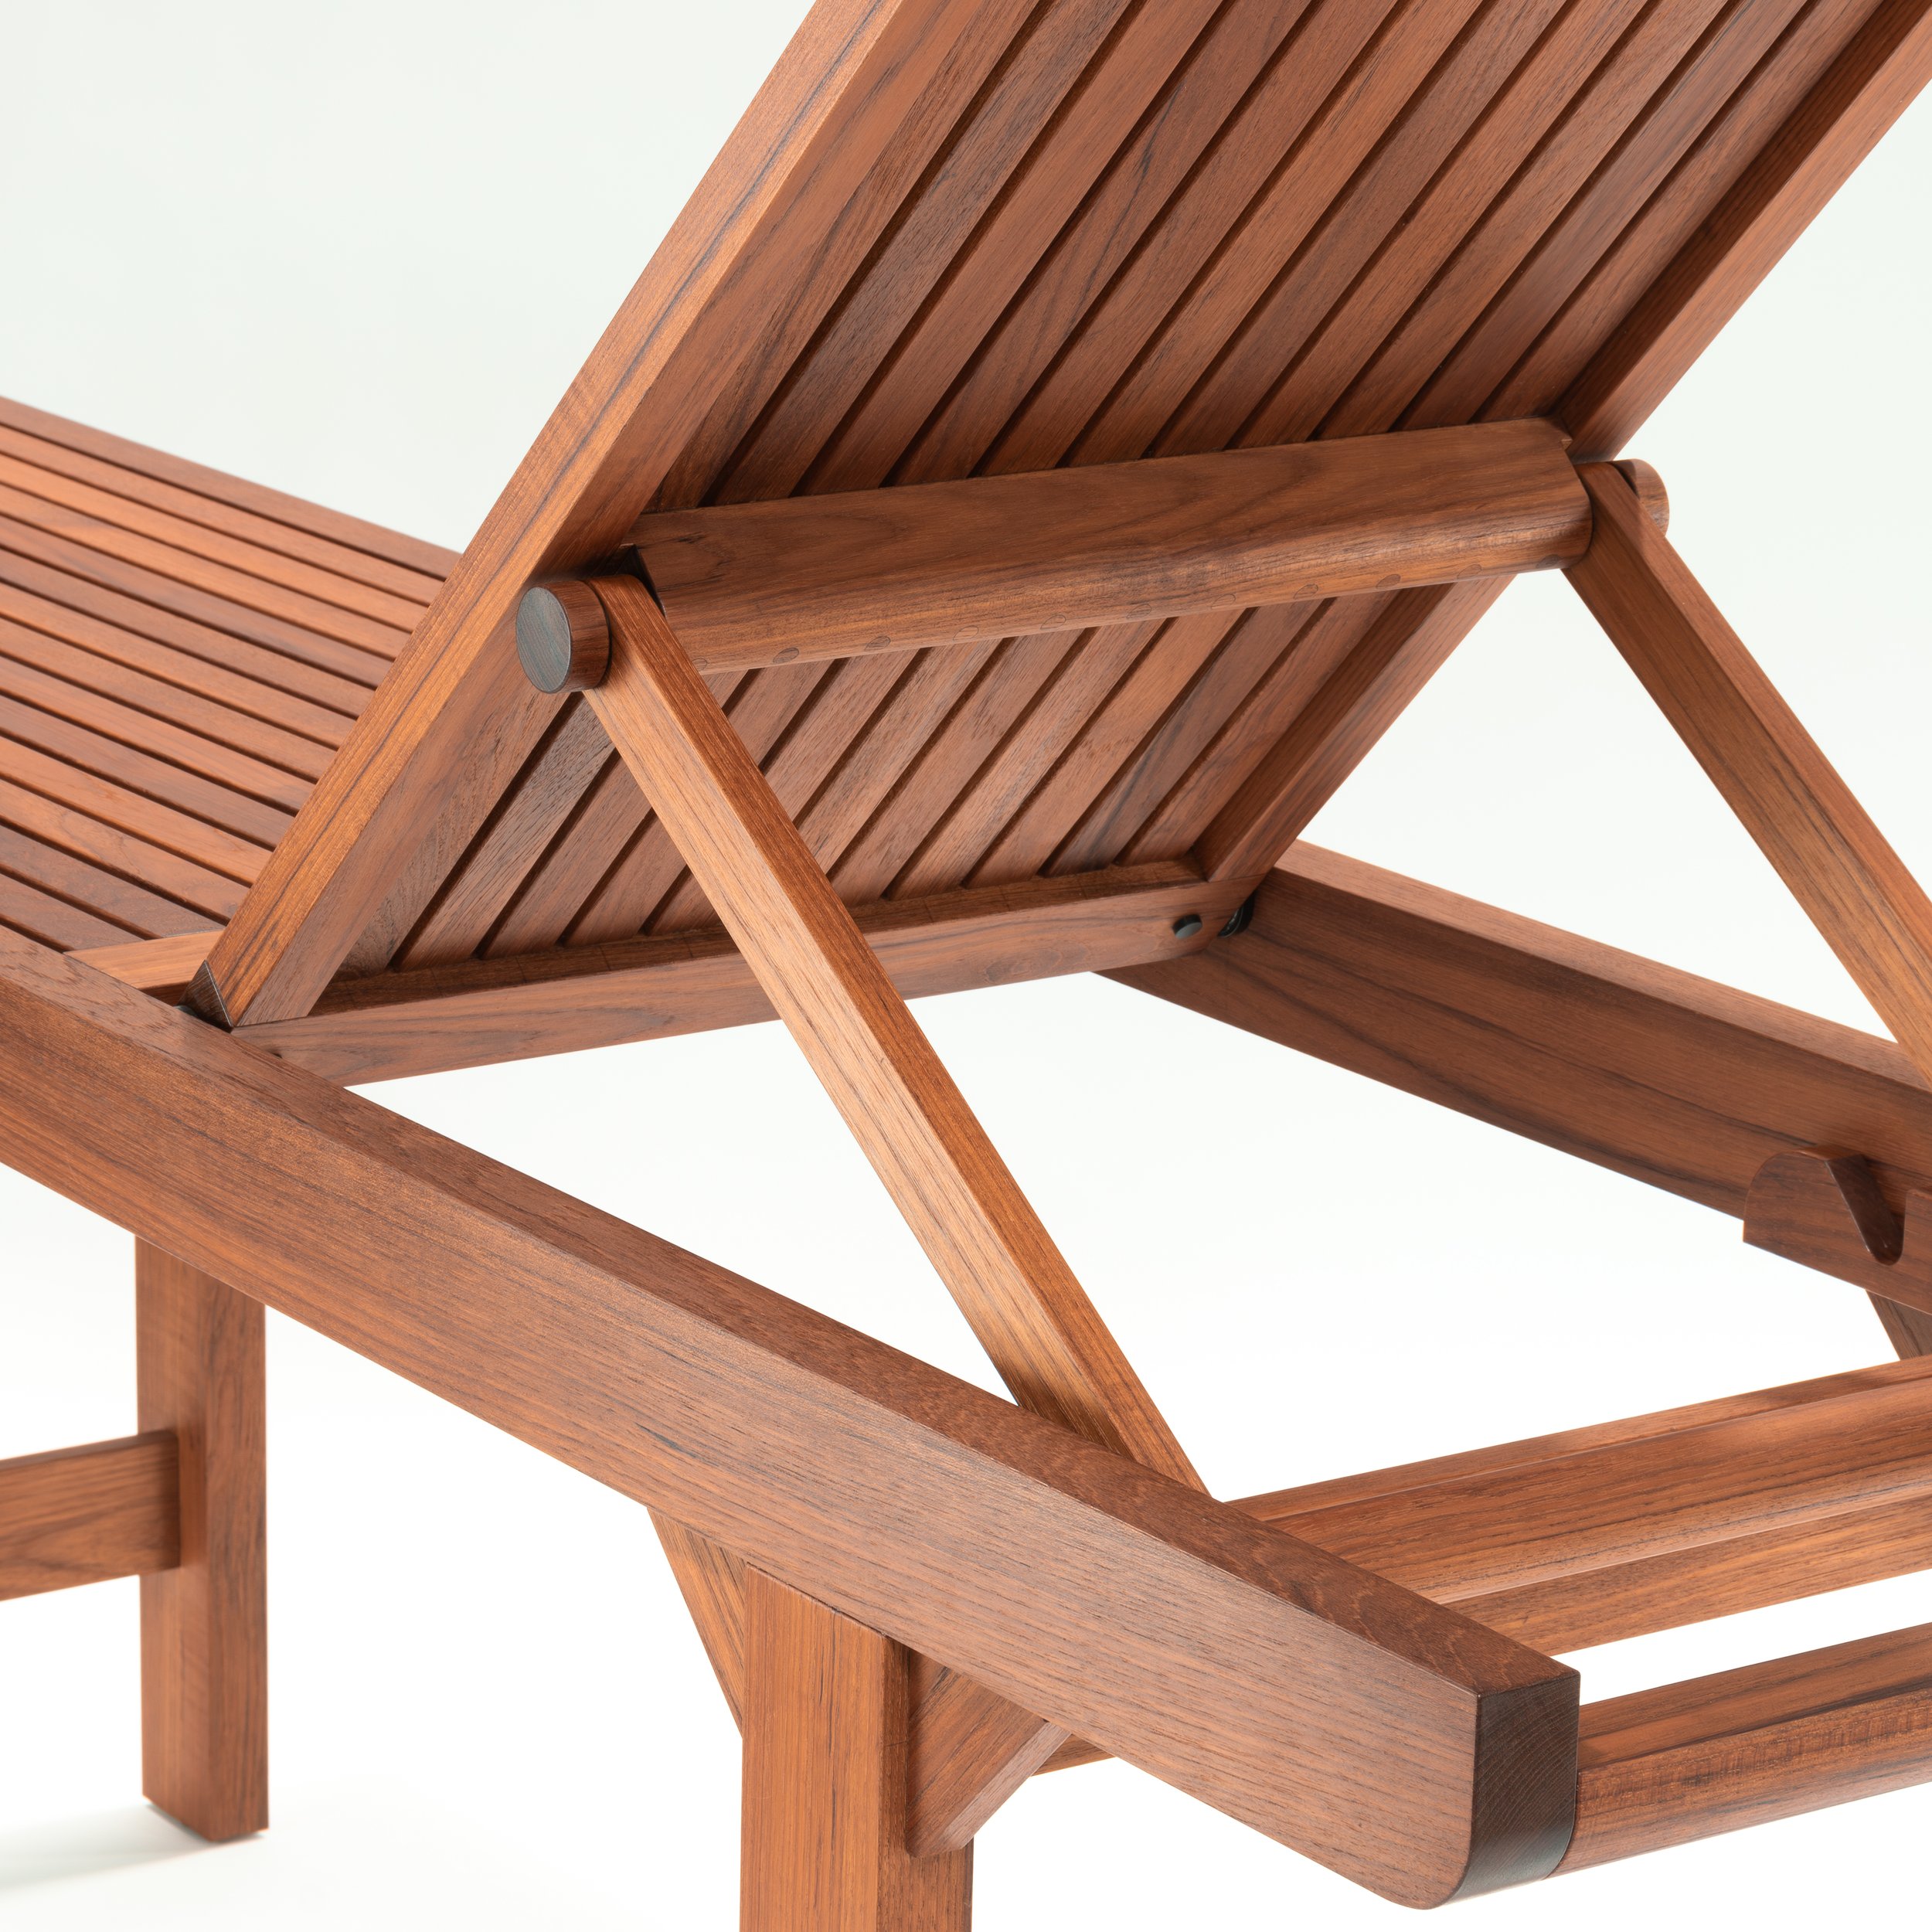
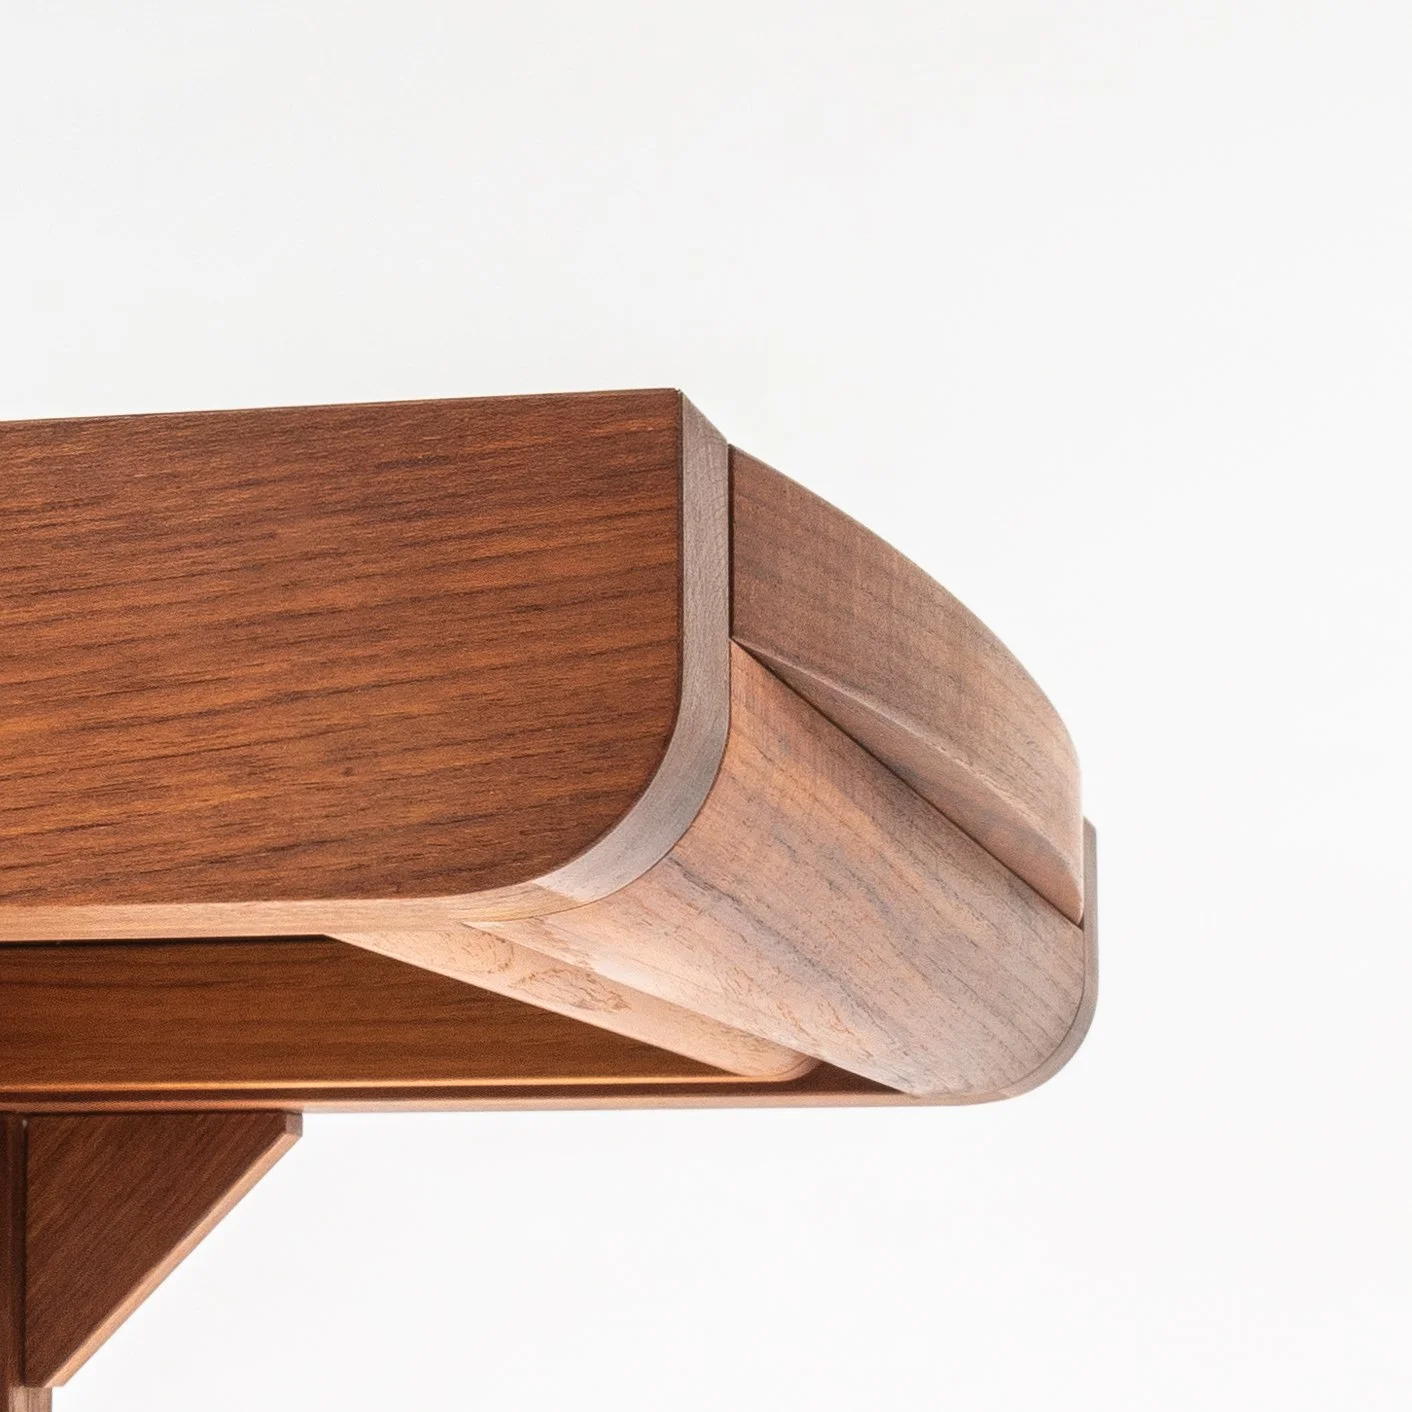
I wanted the subtleties to set these pieces apart. The back pivot is positioned as close the user’s center of mass as possible for greater stability. Custom machined Delrin bushings provide smooth, precise movement and reduce the chance of moisture accumulating at pivot points. A slight arc to the head of the backrest allows for a finger ledge to lift and helps indicate orientation. The back integrates seamlessly into the design when down, and there is a slight positive lock when the back is raised and stowed. Small fillets at all edges provide touch friendly surfaces and keep joints from looking misaligned during the inevitable expansion and contraction of the wood.
![mechanism FINAL.jpg](https://images.squarespace-cdn.com/content/v1/5c89d4d14d8711f0c89e0e2c/1692305002983-U3FP7XFM0VC5E2B998YG/mechanism+FINAL.jpg)
![bushings-4.jpg](https://images.squarespace-cdn.com/content/v1/5c89d4d14d8711f0c89e0e2c/1692239202084-H0M41CR7GL570N2E64FR/bushings-4.jpg)
![finger ledge FINAL.jpg](https://images.squarespace-cdn.com/content/v1/5c89d4d14d8711f0c89e0e2c/1692034275070-5Z88HK9YRCEDY1KWI5CV/finger+ledge+FINAL.jpg)
![seamless.jpg](https://images.squarespace-cdn.com/content/v1/5c89d4d14d8711f0c89e0e2c/1692251195156-E0OA0A0EZZZ800UZ8ZRW/seamless.jpg)
![makers mark FINAL.jpg](https://images.squarespace-cdn.com/content/v1/5c89d4d14d8711f0c89e0e2c/1692034273060-M0EOOLYQ5U47QWUGCVGW/makers+mark+FINAL.jpg)
FABRICATION
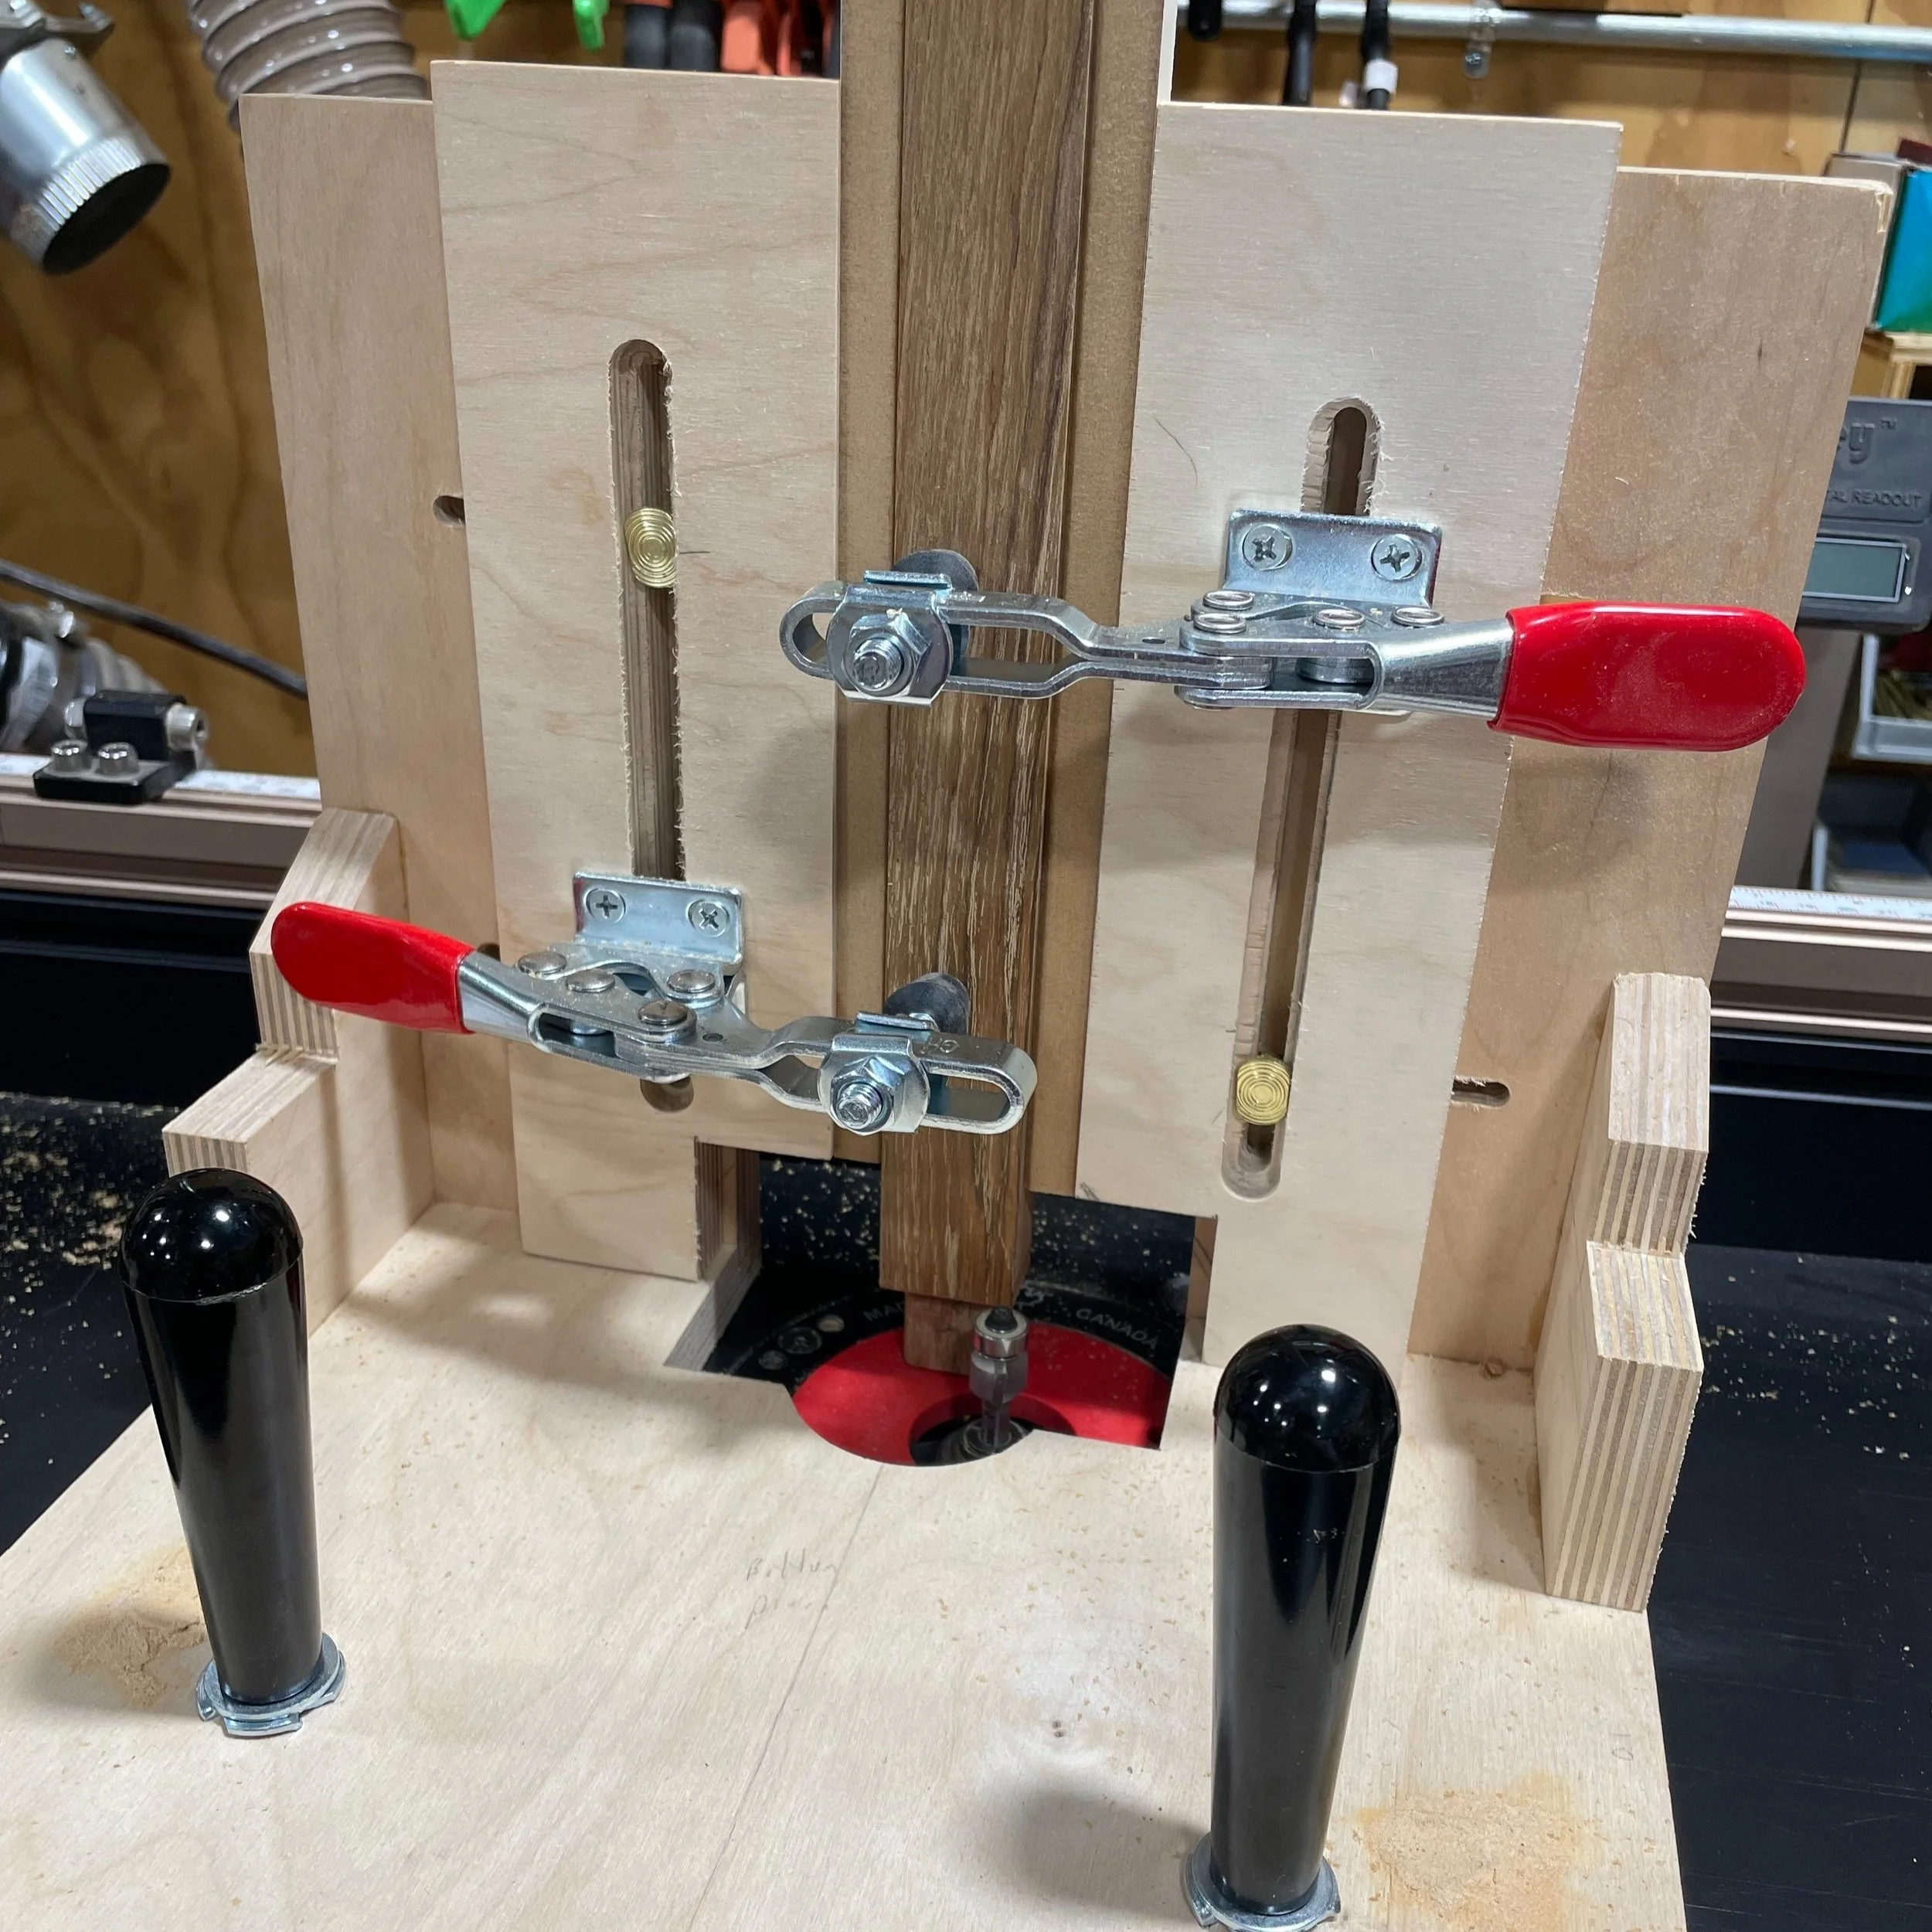
After the CAD design process was completed, I made a quick 1:1 pine buck of the larger bench to work out the kinks. This process included validating the general joining strategy, testing the mechanism design, understanding what jigs needed to be built for certain operations, ordering custom hardware, and getting a feel for the complexities of glue-up. After that legwork, I had a good understanding of the process and production of the final pieces went smoothly.
All photography by Anthony Villanacci